![]()
Basic L1 Support Expectations in a Windows Server Domain
An L1 Support Tech is the "first line of defence," focusing on identity, connectivity, and basic resource access.
Identity & User Management (Active Directory)
These are performed using Active Directory Users and Computers (ADUC).
- Reset a User Password: Providing a temporary password and forcing a "change at next logon."
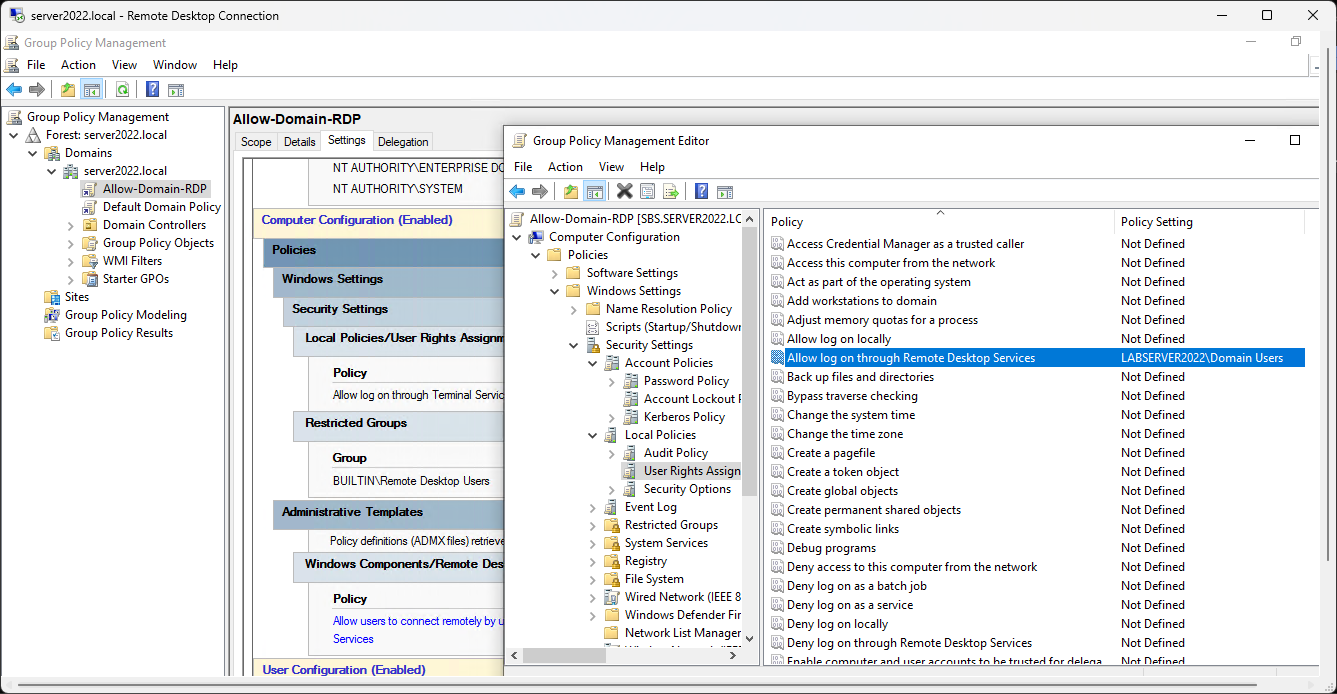
Advanced L2-3 Support - Group policy created to allow Domain Users to login to domain joined PCs without having to be in local PC RDP group first:
- Unlock/Freeze an Account: Checking the "Unlock" box or using "Account is Disabled" for terminations/freezes.

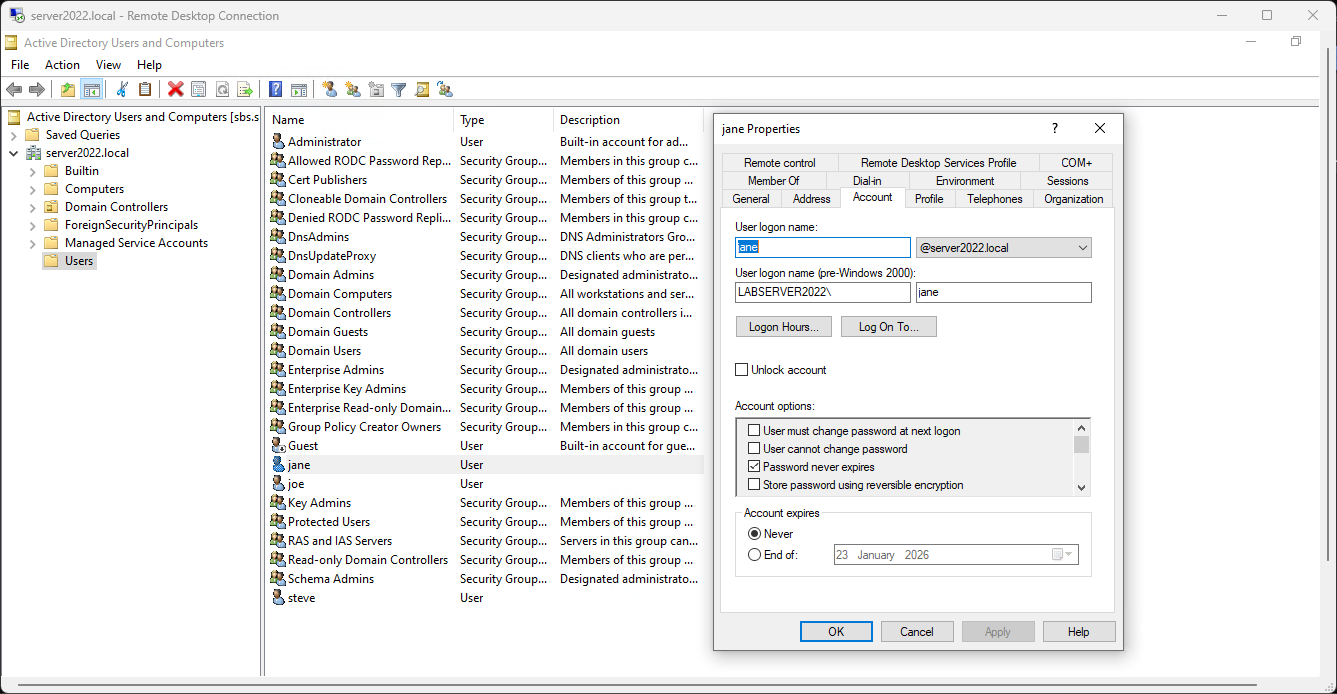
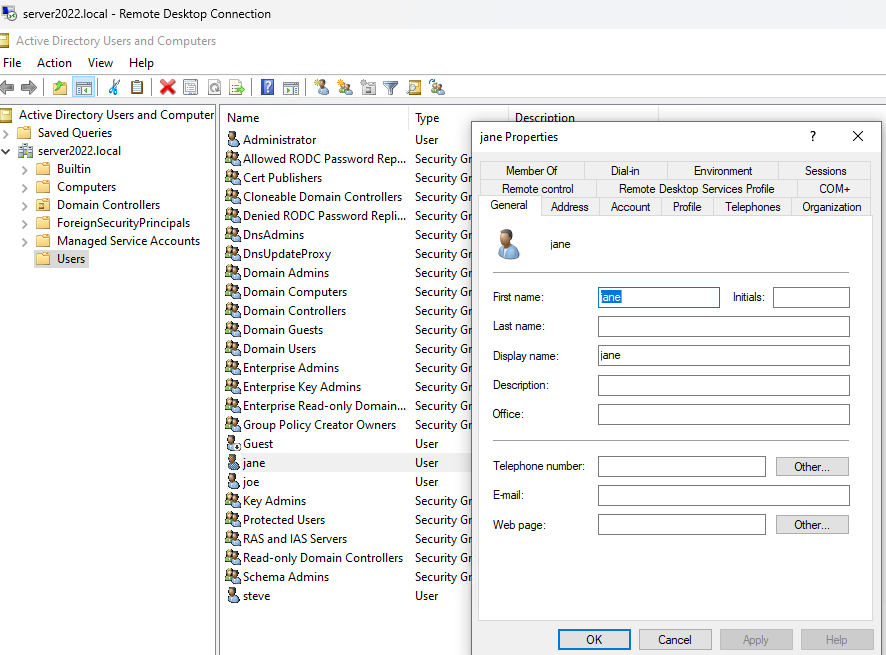
- Create a New Domain User: Setting up the username, UPN (email style), and initial password.
R Click User:

Always use Change Password at next logon – available when Password Never Expires unchecked
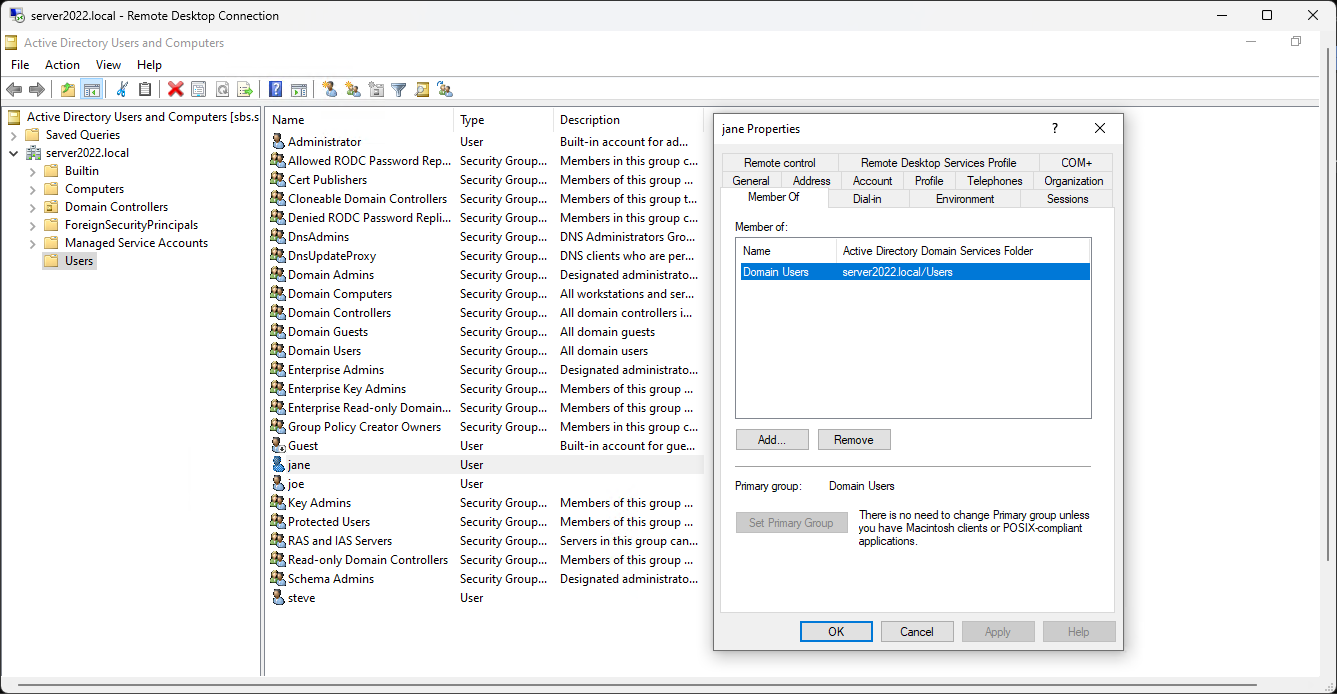
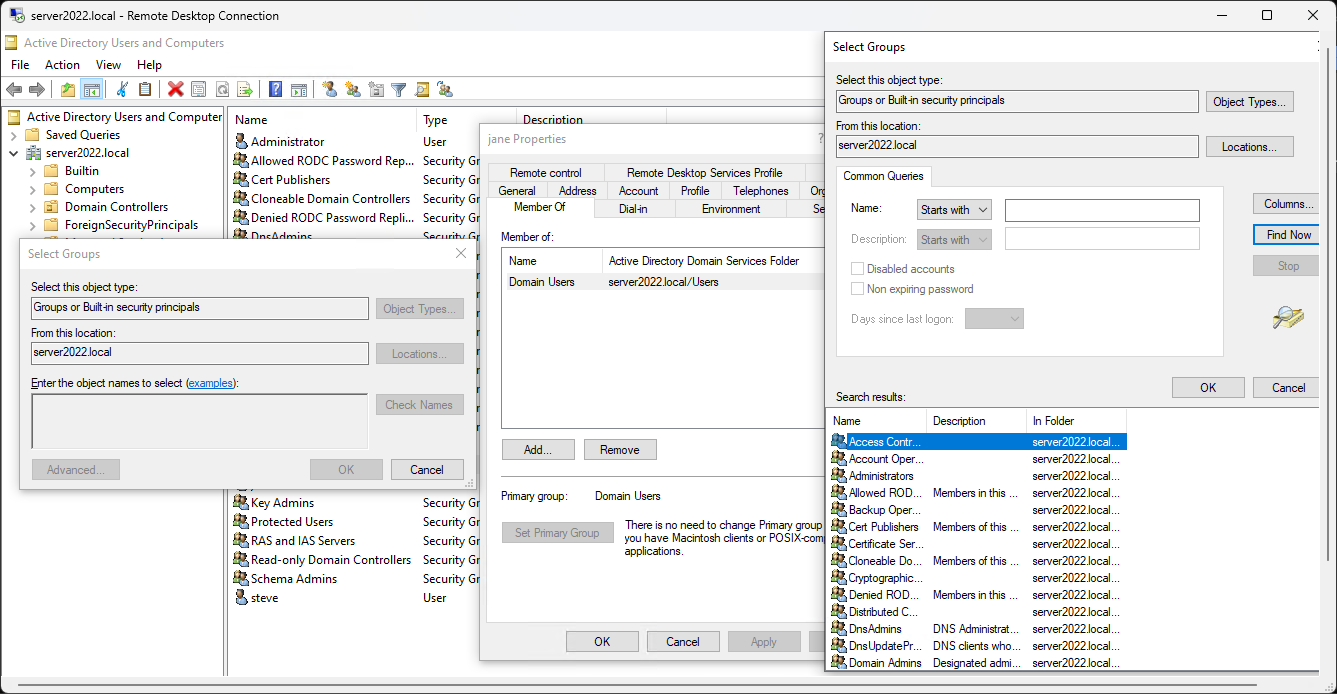
- Modify Group Membership: Adding a user to a department group (e.g., "Accounting") to give them folder access.
- Modify User Attributes: Updating phone numbers, job titles, or office locations in the "Properties" tab.
? File & Resource Access
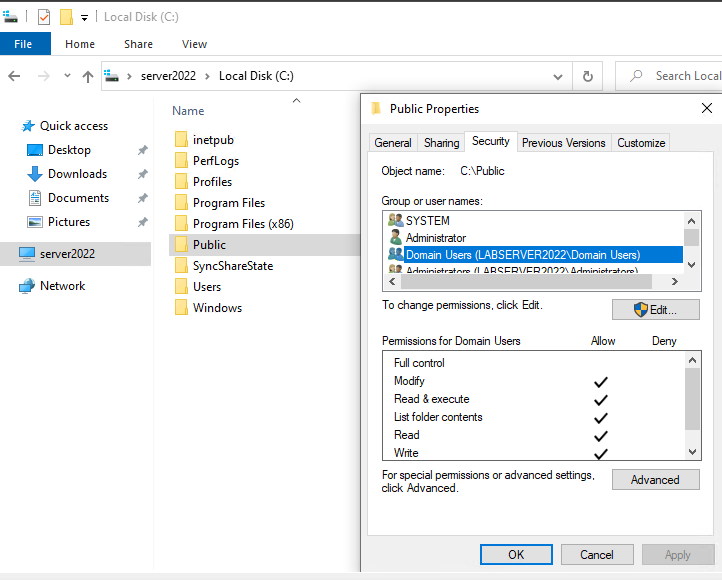
- Check NTFS Permissions: Right-clicking a folder to see who has "Read" vs. "Modify" access.
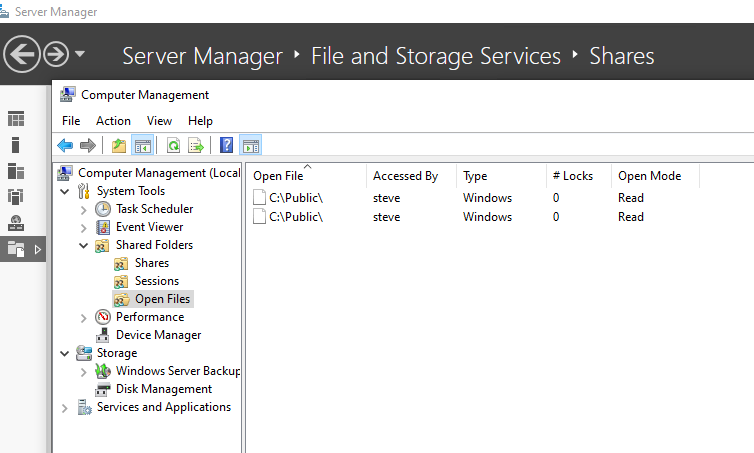
- Identify Open Files: Using Server Manager > Files and Storage Services to see which user has a specific file locked.
- Manage a Print Queue: Clearing stuck documents from a server-hosted printer.
The "Manual Purge" (Most Effective)
If restarting the spooler doesn't work, it’s because the .SHD (shadow) and .SPL (spool) files are still sitting in the system folder.
- Stop the Spooler: net stop spooler (via Admin CMD).
- Clear the Folder: Navigate to: C:\Windows\System32\spool\PRINTERS
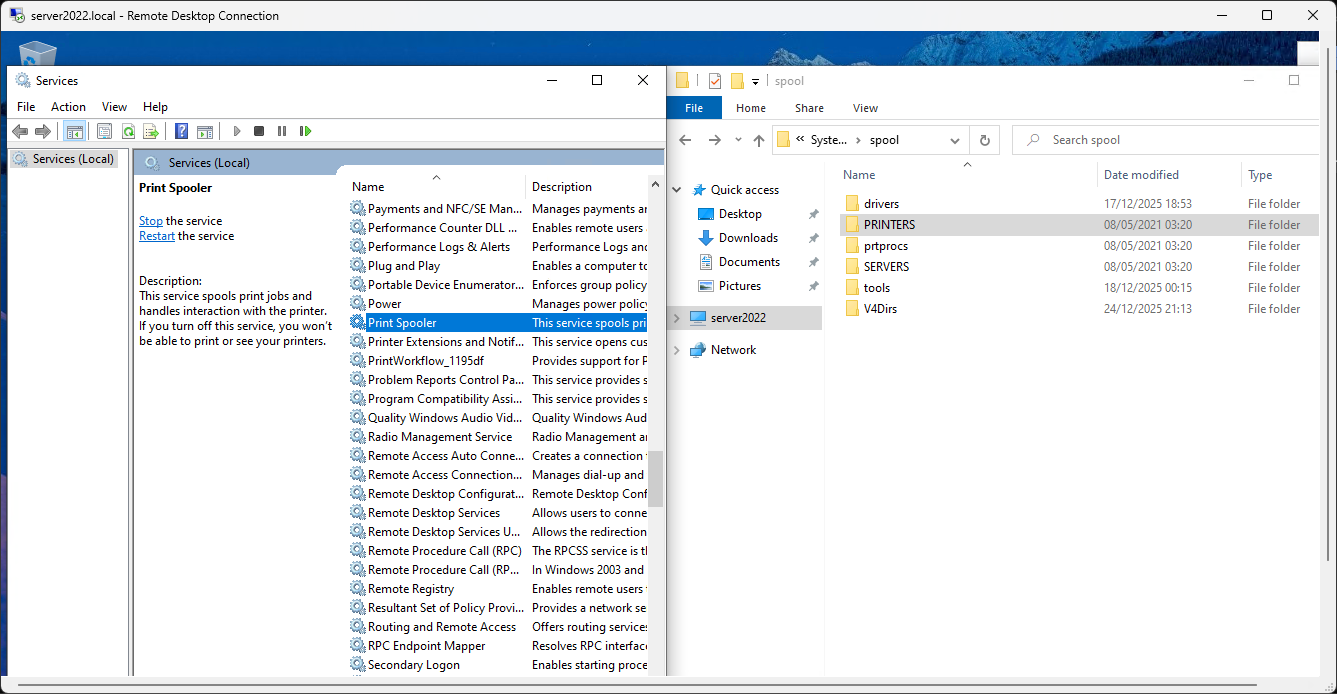
- Delete Everything: Delete every file inside this folder. These are the "ghosts" of the stuck documents.
- Start the Spooler: net start spooler.
- The queue will now be 100% empty.
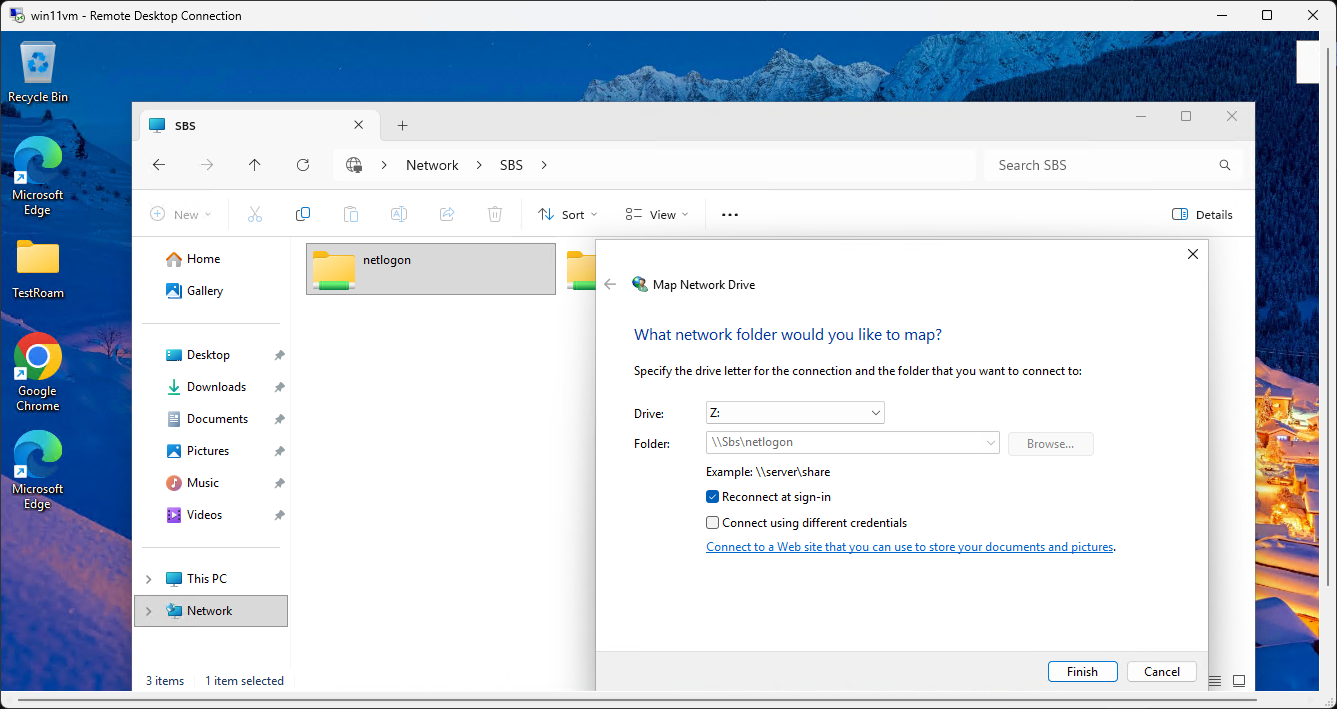
- Map a Network Drive: Using the \\server\share path to connect a client to a server folder.
? Network & Troubleshooting
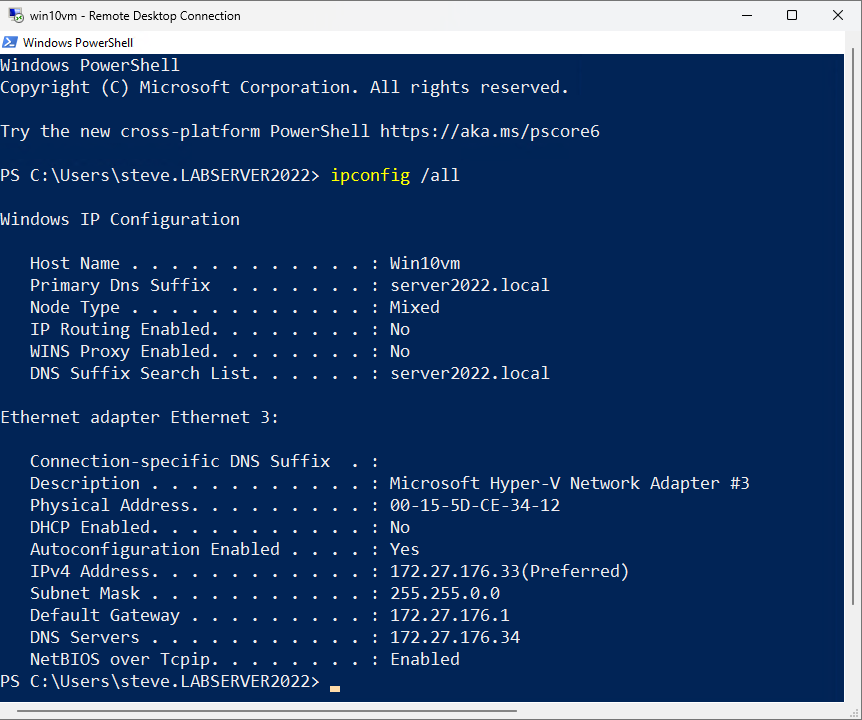
- Basic IP Diagnosis: Running ipconfig /all to verify the IP, Subnet, Gateway, and—most importantly—the DNS server.
- Test Name Resolution: Using nslookup or ping to see if a name (like sbs) resolves to the correct IP.
PS C:\Users\steve.LABSERVER2022> nslookup google.com
Server: UnKnown
Address: 172.27.176.34
Non-authoritative answer:
Name: google.com
Addresses: 2800:3f0:4005:40c::200e
172.217.30.206 (Google data center IP address)
- Flush/Register DNS: Running ipconfig /flushdns and /registerdns to fix "ghost" entries.
- Check Service Status: Opening services.msc to see if a critical service (like Print Spooler) is "Running."
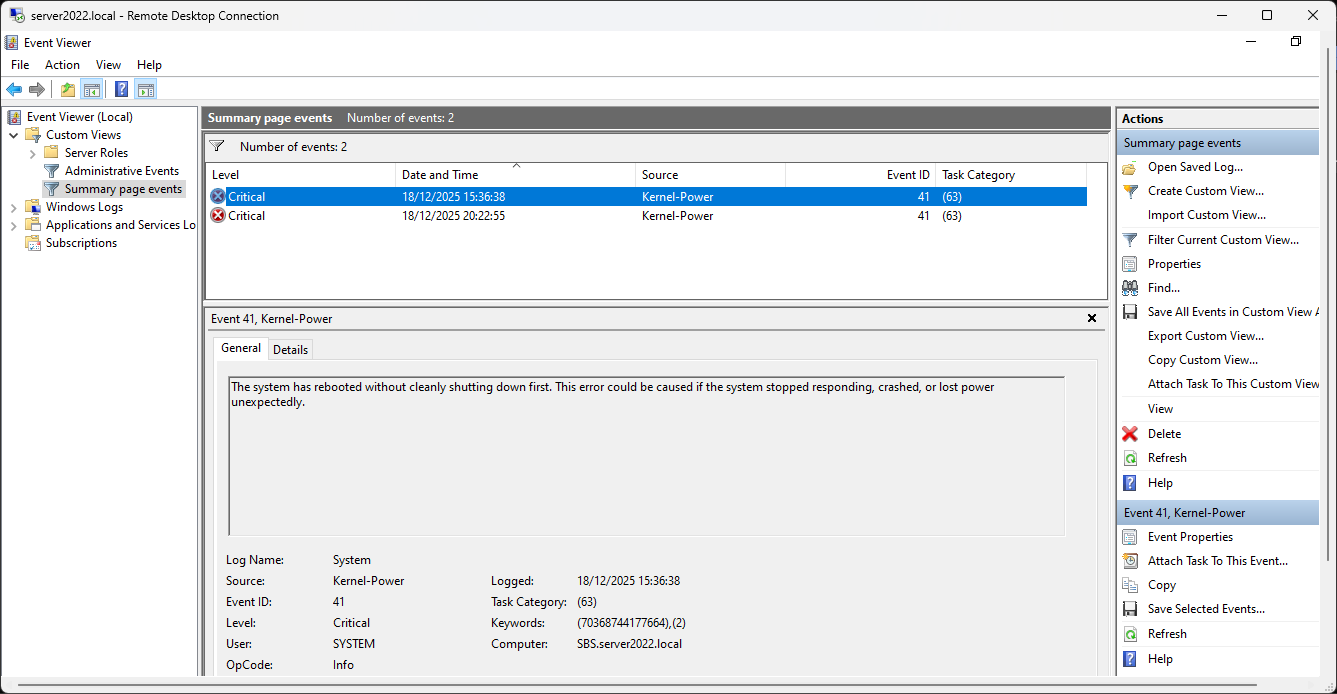
Server Health & Monitoring
- Use Event Viewer: Looking at "System" or "Application" logs to find the specific "Red X" error code for a failure.
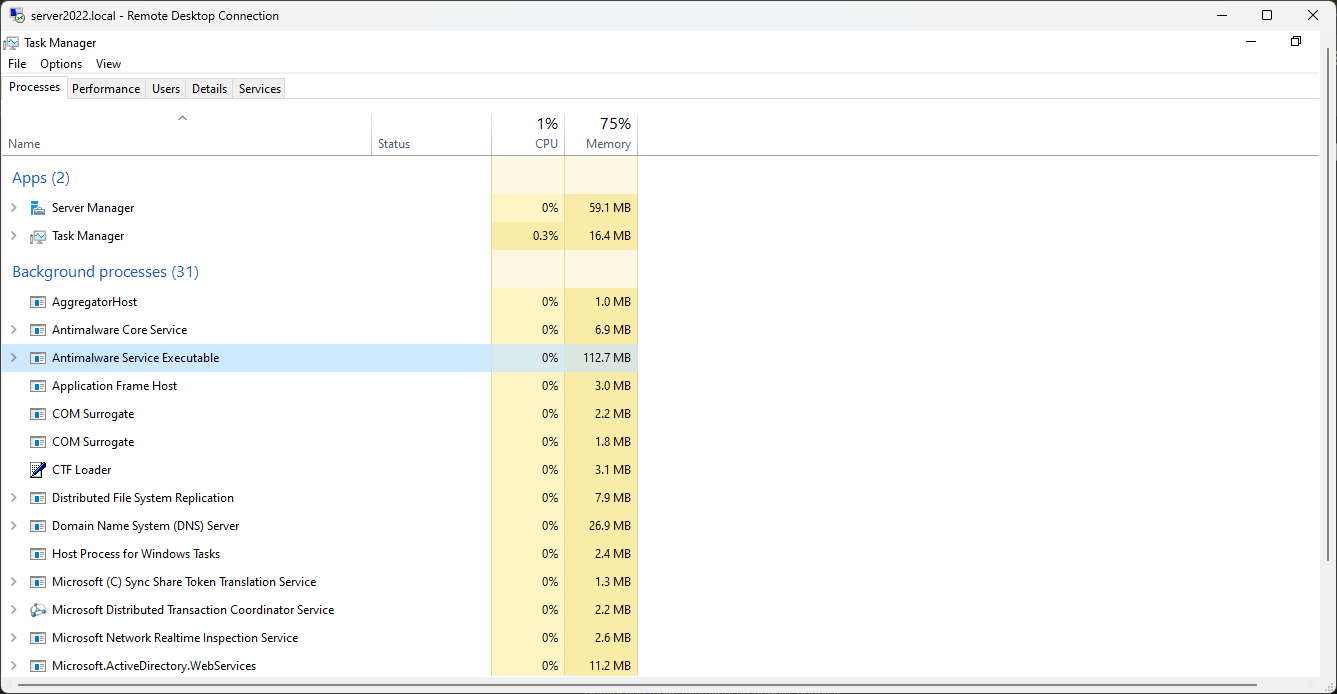
- Task Manager (Server Edition): Identifying which process is eating the server's CPU or RAM.
R Click Taskbar:
- Restart a Server Gracefully: Understanding when to use "Planned" vs. "Unplanned" shutdown reasons.
a logging tool for the System Event Log. Choosing the right one helps you (or an auditor) look back months later to see why the server was offline.
Here is the simple rule of thumb for your lab:
?? Use "Planned" When...
You are the one initiating the action and the server is healthy.
- Maintenance: You are shutting down to copy the VM to your USB.
- Installation: You just installed a new role or software that requires a reboot.
- Configuration: You changed the IP address or renamed the server.
- Hardware Upgrade: (In the physical world) You are adding RAM to the host.
Selection in Menu: Operating System: Reconfiguration (Planned) or Other (Planned).
? Use "Unplanned" When...
The shutdown was forced by an outside factor or a system failure.
- Power Failure: Your laptop battery died or the power cord was pulled.
- System Crash (BSOD): The server froze or hit a Blue Screen of Death.
- Unresponsive: The server was so laggy you had to "Turn Off" via Hyper-V Manager instead of the Start Menu.
------------------------
Identify
Open Files: Using Server Manager > Files and Storage Services to see which user has a specific file locked.
Manage
a Print Queue: Clearing stuck documents from a server-hosted printer. And understanding when to use "Planned" vs. "Unplanned" shutdown reasons."
When a server acts as a Print Server, all the documents sit in a "Spooler" folder on the server before being sent to the physical printer.
- How to do it:
- On the server, go to Control Panel > Devices and Printers (or type printmanagement.msc in the Run box for the pro version).
- Double-click the printer in question to see the list of documents.
- To clear a jam: Click Printer > Cancel All Documents.
- The "Nuclear" Option: If they won't delete, you open services.msc, Stop the "Print Spooler" service, manually delete the files in C:\Windows\System32\spool\PRINTERS, and then Start the service again.
- Why we do it: One corrupted 50MB PDF can block the entire office from printing all day.
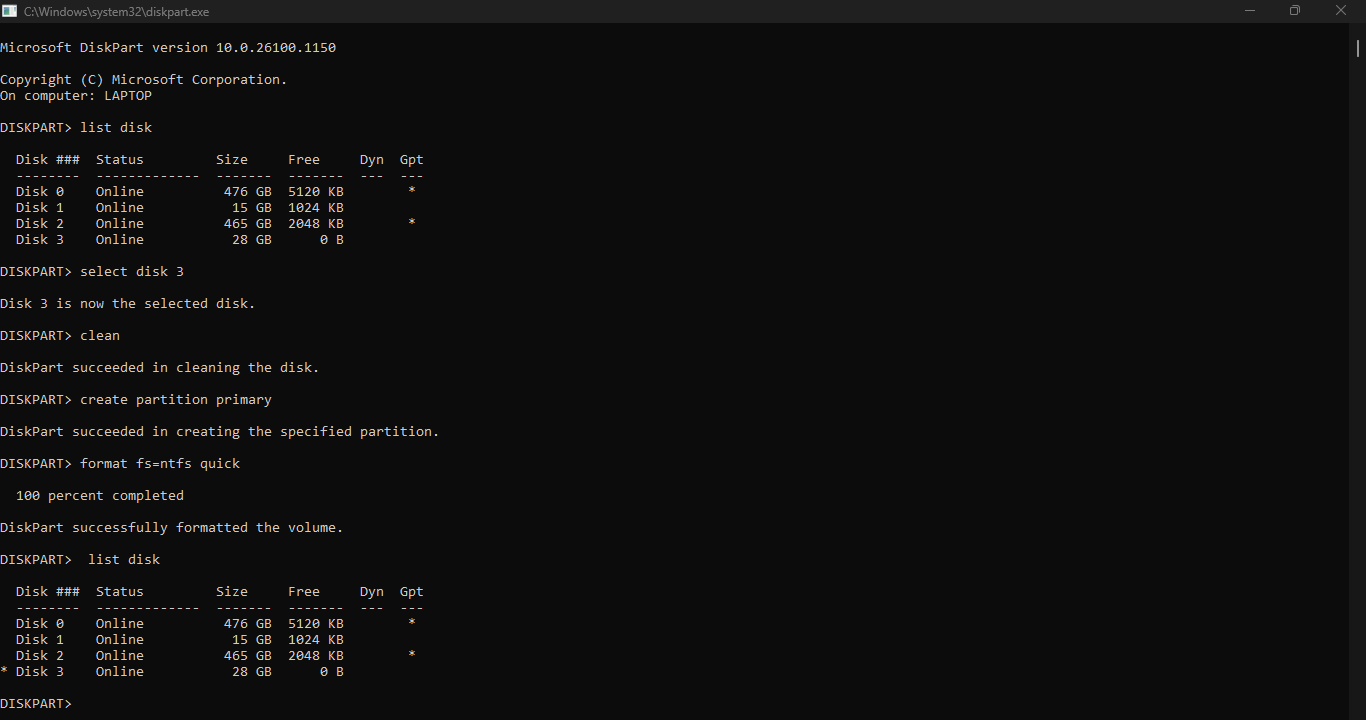
Using DISKPART when WSL2 Linux cannot see the /mnt drive that has not past through the Win/Linux file share boundary:
This is a common frustration when a Windows Recovery or Boot tool "claims" a drive—it creates a 32GB partition and leaves the rest as unallocated space, often making the drive look like it has "shrunk" at the hardware level.
In WSL2, USB drives do not automatically appear in /mnt/ because that directory is for mounted file systems, not raw hardware. To use cfdisk or gparted, you first have to "attach" the physical hardware to the Linux kernel.
1. Why it isn't in /mnt/
WSL2 is a utility-VM. While it can see your local C: and D: drives via a plan9 network share, it cannot see raw USB devices unless you "pass them through."
2. The "Windows Way" (Easiest Fix)
Before jumping into Linux tools, try the Windows DiskPart tool. It is often more powerful than the "Format" right-click menu for fixing "shrunk" USB sticks.
- Open Command Prompt (Admin).
- Type diskpart.
- Type list disk (Identify your USB stick—usually Disk 1 or 2).
- Type select disk X (Replace X with your USB disk number).
- WARNING: Type clean (This wipes the partition table and the "32GB limit" entirely).
- Type create partition primary.
- Type format fs=ntfs quick.