 Admin 2008 -->
Admin 2008 -->
Admin 2008 -->
Debian Linux Admin – Hard Drive Information
The fdisk/cfdisk/blkid commands are part of packages and available from:
ftp://ftp.kernel.org/pub/linux/utils/util-linux-ng
http://packages.debian.org/lenny/e2fsprogs
To list what drives exist on a Linux system, use
# fdisk -l
To find what filesystem a partition is formatted with:
# blkid /dev/hda1
/dev/hda1: UUID="6740b00a-8a49-43a2-9f1a-a689d1149bbf" TYPE="ext3"
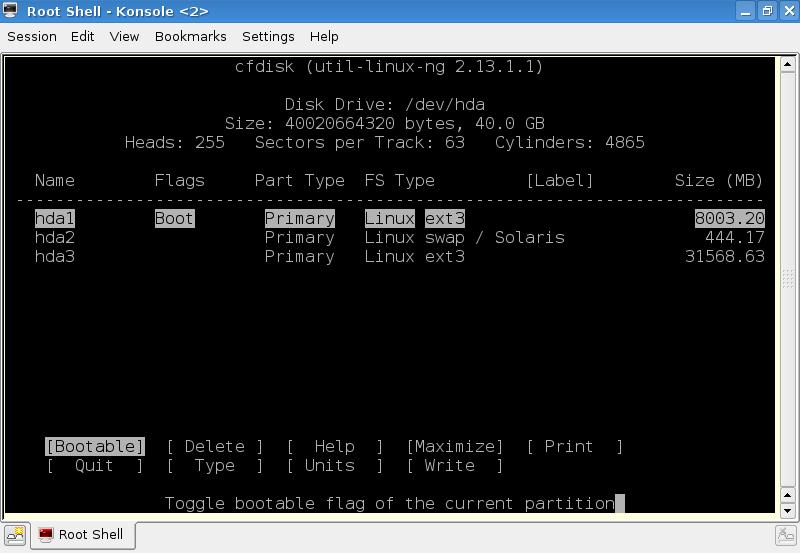
To view and delete partitions etc we can use fdisk:
# fdisk /dev/hda
Linux Fdisk is a powerful tool and should be used with caution to not irreparably damage your drive!
# cfdisk /dev/hda
After a partition is deleted and re-created, a filesytem can be installed on it using the various mkfs options:
http://packages.debian.org/lenny/partconf-mkfstab
black:~# mkfs (TAB)
mkfs mkfs.cramfs mkfs.ext3 mkfs.ext4dev mkfs.msdos
mkfs.bfs mkfs.ext2 mkfs.ext4 mkfs.minix mkfs.vfat
Create a filesystem on partition 1, eg:
#mkfs.ext3 /dev/hda1
DONT CONFUSE the drive naming systems of Linux and Windows or GRUB:
Windows controller0, Master drive, partition C; or
Linux controller 0, primary drive, primary partition = /dev/hda1;
GRUB controller 0, primary drive, primary partition = (hd0,1)
Note ALSO!: GRUB controller 0, primary drive, MBR = (hd0,0) Primary partitions can ONLY be numbered 1-4 (legacy reasons), and ther must be at least 1 primary per drive. Only 1 of the 3 remaining can be an extended partition, so it is numbered 5.This means you can get some seemingly weird numbers on a system with many drives, eg hda5-7 (1P, 3Ext), and it can be confusing if you don't know this. eg The first extended partition on a Primary drive becomes /dev/hda5, even though you may not have primary partitions 2-4 created.
This could of course be any letter you like in a Windows system, so you have to use the Disk Mgr in Windows to see exactly what is what graphically
A filesystem check can be run safely only on unmounted drives:
http://packages.debian.org/lenny/e2fsck-static
black:~# fsck (TAB)
fsck fsck.ext2 fsck.ext4 fsck.minix fsck.nfs
fsck.cramfs fsck.ext3 fsck.ext4dev fsck.msdos fsck.vfat
# fsck.ext3 /dev/hda1
e2fsck 1.41.3 (12-Oct-2008)
/dev/hda1: clean, 42944/488640 files, 269855/1953897 blocks
ntfs-3g - Third Generation Read/Write NTFS Driver
http://packages.debian.org/lenny/ntfs-3g
NTFS is now fully supported for reading AND writing in Linux, and is installed with:
#apt-get install ntfs-3g
# mount -t ntfs /dev/sda2 /blacksda2/
#blkid /dev/sda2
/dev/sda2: UUID="12D41D14D41CFC23" LABEL="stewieD" TYPE="ntfs"
Boot Loaders – GRUB
http://packages.debian.org/lenny/grub
The default BL for Linux is GRUB, not LILO anymore, and is a powerful boot menu and boot sector manipulation tool that can be used to multiboot Win and Unix systems on one PC.
Its info is installed in the MBR in 2 stages of info that is found in /boot/grub/stage(1,2) files. These need to be present if GRUB is to be installed on a hard drive from the command line.
On mutli-drive systems a device map can be created with:
#grub-mkdevicemap
which creates
/boot/grub/device.map
containing something like:
(fd0) /dev/fd0
(hd0) /dev/hda
(hd1) /dev/hdb
(hd2) /dev/sda
(hd3) /dev/sdb
This info can now be used to install GRUB on another drive that may be a clone of the current system for backup for example that you later will boot on another PC, so needs a bootable MBR installed.
Using the grub terminal and the above info, we can use the current info of the this systems primary disk partition (hd1 = /dev/hdb, partition 0 in this case), or “root” drive and install its GRUB info in another's MBR not forgetting to make it as bootable or “active” using fdisk or cfdisk if required:
#grub
Probing devices to guess BIOS drives. This may take a long time.
grub>root (hd1,0)
Filesystem type is ext2fs, partition type 0x83
Hard Drive Imaging, Manipulation and Wiping
http://packages.debian.org/lenny/coreutils
Copying of the Master Boot Records of ALL of the hard drives on a system may well save a you a big data recovery nightmare later in the event of a Master Boot Record corruption caused by a power outage, improper shutdown of Windows or Linux, a Virus, an accidental live drive removal on a non “hot swap” system or other cause.
The “Copy and Convert” program – DD – is a versatile app that can be used to copy the MBRs of hard drives, whether Win, Linux, or other. As only drive partitions are mounted, not the MBR or primary partition table, any MBR can be copied from any drive attached to the system.
The MBR is 512 bytes long for IBM compatible systems, and is called boot sector 0, which is broken down into smaller coded sections of different purposes such as storing partition table and disk ID info.
It is important to realise that this sector points to the actual data on a disk, so makes the data inaccessible if this sector is damaged even though the data itself may still be intact and recoverable.
How many times has a disk been reformatted and data lost when only the MBR was corrupt and may possibly have been replaced or re-built..? A disk holding the Operating System particularly, should have its MBR copied and stored safely along with all other backups deemed important, but is often overlooked, or not known about.
More info on MBR sectors at Wikipedia here:
http://en.wikipedia.org/wiki/Master_boot_record
Address Description Size
in
bytes
Hex Oct Dec
0000 0000 0 code area 440(max. 446)
01B8 0670 440 disk signature (optional) 4
01BC 0674 444 Usually nulls; 0x0000 2
01BE 0676 446 Table of primary partitions
(Four 16-byte entries, IBM partition table scheme) 64
01FE 0776 510 55h MBR signature;
0xAA55[1] 2
01FF 0777 511 AAh
MBR, total size: 446 + 64 + 2 = 512
As seen above, it is possible to copy or replace some or all of the MBR in 1 byte (8 bits) chunks, where 1 BLOCK (count) = 512 bytes, to include only the partition table data for example as below. To copy the whole MBR using DD:
# dd if=/dev/sda of=/mbr bs=512 count=1
to copy (where the input file [if] has to be a device not a mount point, unlike the output file) for DD and reversing the if/of to replace it, or...
# dd if=mbr of=/dev/hda bs=1 count=64 skip=446 seek=446
to write back just the partition table section.
DD is available for Win NT systems also.
This is the WinNT cmd line for dd-0.5 that copies from the unmounted hidden partition0 on a Vista pc:
dd.exe if=\\?\Device\Harddisk0\Partition0 of=\\.\d:/mbr bs=512 count=1
DD can be used to image or wipe whole drives, right from sector 0 just like Ghost or other tools, but its free and simple and can be done from a Linux live bootable CD on a Winbox etc. so an OS and GUI is not required and is as simple as:
#dd if=/dev/hda of=/dev/hdb
This will take a long time depending on the drive size being imaged, (hdb must be equal to or bigger than hda obviously) and can take hours over a network in conjunction with Netcat – even with gzip/bzip2 compression:
Host A (drive to be imaged)
# dd if=/dev/hda | gzip | netcat 192.168.0.1 9999
Host B: IP address 192.168.0.1 (drive to copy to)
# netcat -l – p 9999 | gunzip | dd of=/dev/hdb
Unfortunately, as only partitions can only be mounted in Linux (or any OS?), whole drives with MBR can not be mounted.
I found it better for net transfer to prepare a drive with the same partitions as the one to be imaged and mount them with Samba as a normal share and just use dd locally to image partitions as its quicker this way over the net, as the compression and decompression overheads with gzip/bzip2 take a lot of resources and seemed slower! You can then install GRUB seperately later on the actual imaged drive so its a bootable clone.
Another option could be to compress the drive image locally then transfer it over the net, decompress it, then use dd to write it to an empty drive. A zero bit file could be written to fill the drive first then deleted using the zero fill trick:
#cat /dev/zero > /mounted_drive_to_be_imaged/zero.fill
As this fills all unused space with zeroes, and is then deleted, it ensures maxim compression of only wanted data for a smaller image file. The image file can be DD'd back to a whole drive then.
Realistically, with todays fast Internet and a small Linux base OS size, its much quicker to install Linux from scratch, even with KDE, unlike a slow DVD re-install of Windows. So unless there is a really good reason to have an exact clone of a Linux system, its a bit pointless mostly.
Windows is a different story of course, because of OS and 3rd party programs re-installation which takes forever and is a single PC specific license, corporate protectionism etc.
To wipe a whole drive:
#dd if=/dev/zero of=/dev/hda
Pendrives – supposedly can have their sectors, heads and cylinders changed
http://www.behave.nu/tech/USB_pendrive.html
so they boot from BIOS if they don't by default, as they are only virtual hard drives with only memory pages, so s,h,and c are for OS compatability duping. They do appear to have preset set coding (a BIOS of sorts?) themselves with for USB detection and mounting parameters which is what can be irreparably damaged by surges etc.
My Sandisk 1GB pendrive has these traits below, and is bootable from all my PCs and laptops BIOS's bar 1 old PC (dodgy BIOS locks up with USB pen)
#fdisk /dev/sdd
Command (m for help): p
black:~# fdisk /dev/sdc
Command (m for help): p
Disk /dev/sdc: 1024 MB, 1024966656 bytes
32 heads, 62 sectors/track, 1009 cylinders
Units = cylinders of 1984 * 512 = 1015808 bytes
Disk identifier: 0x001adee9
After deleting the DOS partition that caused a complaint between physical and logical cylinders on partition1, creating a new one, and re-inserting:
Command (m for help): p
Disk /dev/sdc: 1024 MB, 1024966656 bytes
32 heads, 62 sectors/track, 1009 cylinders
Units = cylinders of 1984 * 512 = 1015808 bytes
Disk identifier: 0x001adee9
Device Boot Start End Blocks Id System
/dev/sdc1 * 1 1009 1000897 83 Linux
Note the bootable partition flag is SET *
I now create an ext3 filesystem on it with:
# mkfs.ext3 /dev/sdc1
mke2fs 1.41.3 (12-Oct-2008)
Filesystem label=
OS type: Linux
Block size=4096 (log=2)
Fragment size=4096 (log=2)
62592 inodes, 250224 blocks
12511 blocks (5.00%) reserved for the super user
First data block=0
Maximum filesystem blocks=260046848
8 block groups
32768 blocks per group, 32768 fragments per group
7824 inodes per group
Superblock backups stored on blocks:
32768, 98304, 163840, 229376
Writing inode tables: done
Creating journal (4096 blocks): done
Writing superblocks and filesystem accounting information: done
This filesystem will be automatically checked every 34 mounts or
180 days, whichever comes first. Use tune2fs -c or -i to override.
I now want to try to make a bootable Linux OS on it from my baseinstall I have installed on a hard drive.
#mount /dev/hda1 /sparehda1
#mount /dev/sdc1 /mnt
# mirrordir -vr /sparehda1/ /mnt
mirrordir: Total mirrored: 725970kB
The size of the spare install drive when mounted is:
# du -h /sparehda1
790M /sparehda1
# df -h /mnt/
Filesystem Size Used Avail Use% Mounted on
/dev/sdc1 963M 807M 107M 89% /mnt
which will just fit on the 1GB cruzer. This would be fine as a portable, bootable OS. The main problem with a small portable OS is wheter it has netcard drivers in its library for the host PC, as without this you can't access the Internet or download required additions.
When mirrordir has finished copying, GRUB is installed on the bootable pendrive, to boot into the OS
#grub-mkdevicemap
#vi /boot/grub/device.map
(fd0) /dev/fd0
(hd0) /dev/hda
(hd1) /dev/hdb
(hd2) /dev/sda
(hd3) /dev/sdb
(hd4) /dev/sdc
#grub
>root (hd1,0)
Filesystem type is ext2fs, partition type 0x83
>setup (hd4)
Checking if "/boot/grub/stage1" exists... yes
Checking if "/boot/grub/stage2" exists... yes
Checking if "/boot/grub/e2fs_stage1_5" exists... yes
Running "embed /boot/grub/e2fs_stage1_5 (hd4)"... 17 sectors are embedded.
succeeded
Running "install /boot/grub/stage1 d (hd4) (hd4)1+17 p (hd1,0)/boot/grub/st
age2 /boot/grub/menu.lst"... succeeded
Done.
The problem now is it wont boot via grub..
To find drives with grub folders present:
#grub
>find /boot/grub/stage1
(hd0,0)
(hd1,0)
(hd4,0)
Select the one you wish to use as root for the above section
Alter GRUBs boot menu options in
# vi /boot/grub/menu.lst
My Sandisk Cruzer 8GB has 2 partitions, one emulating a cdrom with Apps for Win ejection software etc. so has odd traits, one which is /dev/sr0:
Command (m for help): p
Disk /dev/sdd: 8213 MB, 8213305856 bytes
255 heads, 63 sectors/track, 998 cylinders
Units = cylinders of 16065 * 512 = 8225280 bytes
Disk identifier: 0x00000000
Device Boot Start End Blocks Id System
/dev/sdd1 1 997 8008373+ c W95 FAT32 (LBA)
# fdisk /dev/sr0
You will not be able to write the partition table.
Note: sector size is 2048 (not 512)
Device contains neither a valid DOS partition table, nor Sun, SGI or OSF disklabel
Building a new DOS disklabel with disk identifier 0x2b2f5cb0.
Changes will remain in memory only, until you decide to write them.
After that, of course, the previous content won't be recoverable.
You must set cylinders.
You can do this from the extra functions menu.
Warning: invalid flag 0x0000 of partition table 4 will be corrected by w(rite)
Logical Volume Manager
# apt-get install lvm2
read:
man lvm
man pvcreate
DESCRIPTION
pvcreate initializes PhysicalVolume for later use by the Logical Volume Manager (LVM). Each PhysicalVolume can be a disk partition, whole disk, meta device, or loopback file. For DOS disk partitions, the partition id should be set to 0x8e using fdisk(8), cfdisk(8), or a equivalent. For whole disk devices only the partition table must be erased, which will effectively destroy all data on that disk.
# pvcreate /dev/hdc1
# pvcreate /dev/hdd1
This preps the drives for use by the LVM device mapper, /dev/mapper.
The drives are added to a Volume Group of name Storage80G: vgcreate Storage80G /dev/hdc1 /dev/hdd1
netstorage:~# pvdisplay
--- Physical volume ---
PV Name /dev/hdc1
VG Name Storage80G
PV Size 37.27 GB / not usable 2.19 MB
Allocatable yes (but full)
PE Size (KByte) 4096
Total PE 9540
Free PE 0
Allocated PE 9540
PV UUID 1ln7Bj-x0Qr-w3Ta-dl1G-Hsfm-xzn8-lDsEfA
--- Physical volume ---
PV Name /dev/hdd1
VG Name Storage80G
PV Size 37.27 GB / not usable 2.19 MB
Allocatable yes (but full)
PE Size (KByte) 4096
Total PE 9540
Free PE 0
Allocated PE 9540
PV UUID uj58fP-5KhO-DuZf-Btjt-Gl50-c6AU-XwmmTK
Current info on VGs can be viewed with:
vgdisplay:
# vgdisplay
--- Volume group ---
VG Name Storage80G
System ID
Format lvm2
Metadata Areas 2
Metadata Sequence No 3
VG Access read/write
VG Status resizable
MAX LV 0
Cur LV 1
Open LV 1
Max PV 0
Cur PV 2
Act PV 2
VG Size 74.53 GB
PE Size 4.00 MB
Total PE 19080
Alloc PE / Size 19080 / 74.53 GB
Free PE / Size 0 / 0
VG UUID t2nYaj-7yQe-Ye01-n7ak-ui21-G50e-EXhufB
# lvmdiskscan
/dev/ram0 [ 8.00 MB]
/dev/dm-0 [ 74.53 GB]
/dev/ram1 [ 8.00 MB]
/dev/hda1 [ 19.53 GB]
/dev/hdc1 [ 37.27 GB] LVM physical volume
/dev/ram2 [ 8.00 MB]
/dev/root [ 16.76 GB]
/dev/ram3 [ 8.00 MB]
/dev/hda3 [ 1.99 GB]
/dev/ram4 [ 8.00 MB]
/dev/ram5 [ 8.00 MB]
/dev/ram6 [ 8.00 MB]
/dev/ram7 [ 8.00 MB]
/dev/ram8 [ 8.00 MB]
/dev/ram9 [ 8.00 MB]
/dev/ram10 [ 8.00 MB]
/dev/ram11 [ 8.00 MB]
/dev/ram12 [ 8.00 MB]
/dev/ram13 [ 8.00 MB]
/dev/ram14 [ 8.00 MB]
/dev/ram15 [ 8.00 MB]
/dev/hdd1 [ 37.27 GB] LVM physical volume
1 disk
19 partitions
0 LVM physical volume whole disks
2 LVM physical volumes
# pvs
PV VG Fmt Attr PSize PFree
/dev/hdc1 Storage80G lvm2 a- 37.27G 0
/dev/hdd1 Storage80G lvm2 a- 37.27G 0
# pvscan
PV /dev/hdc1 VG Storage80G lvm2 [37.27 GB / 0 free]
PV /dev/hdd1 VG Storage80G lvm2 [37.27 GB / 0 free]
Total: 2 [74.53 GB] / in use: 2 [74.53 GB] / in no VG: 0 [0 ]
# pv
pvchange pvck pvcreate pvdisplay pvmove pvremove pvresize pvs pvscan
# vg
vgcfgbackup vgchange vgconvert vgdisplay vgextend vgmerge vgreduce vgrename vgscan
vgcfgrestore vgck vgcreate vgexport vgimport vgmknodes vgremove vgs vgsplit
Now there is a Volume Group of name Storage80G, a LV device of name LVName can be created from the VG disks, using the total PE value of each: 2 x (single disk PE=9540) = 19080 which can be mounted via /etc/fstab in a directory.
lvcreate -l 19080 -n LVName Storage80G
# ls /dev/mapper/
control Storage80G-LVName
/dev/mapper/unknown filesystem type 'lvm2pv' /LVNameMount/ vfat defaults 0 0
Adding a disk to the Volume Group
Next, we’ll add /dev/hda6 to the Volume Group.
Just type vgextend LVName /dev/hda6 and you’re done.
To remove it use: vgreduce LVName /dev/hda6
To mount it using # mount /dev/mapper/Storage80G-LVName /LVNameMount
and you get: unknown filesystem type 'lvm2pv' when each pv is formatted to say vfat,
you need to load it by changing the attributes of the volumes filesystem using lvchange, so read man lvchange and man vgchange to find:
vgchange -a, --available [e|l]{y|n} Controls the availability of the logical volumes in the volume group for input/output. In other words, makes the logical volumes known/unknown to the kernel. lvchange -a, --available y/n/ey/en/ly/ln
Controls the availability of the logical volumes for use.
Communicates with the kernel device-mapper driver via libdevmapper to activate (--available y(es)) or deactivate (-an) the logical volumes.
# lvchange -ay /dev/mapper/LVName
so run:
# vgchange -ay
check the msg log if the LV doesnt mount with: mount -t vfat /dev/mapper/Storage80G-LVName /LVNameMount
#dmesg | tail
[21786.157338] VFS: Can't find a valid FAT filesystem on dev dm-0.superblock on /dev/mapper/Storage80G-LVName
In this case create a new vfat fs on dm-0 with: # mkfs.vfat /dev/dm-0 and remount. This will of course, wipe any files that were on the Physical Volumes!
http://tldp.org/HOWTO/LVM-HOWTO/lvm2faq.html
http://blog.fosketts.net/guides/walkthrough-logical-volume-manager-linux/
Smartmontools – SMART Capable Drives Information Daemon
SMARTD and SMARTCTRL
http://www.linuxjournal.com/magazine/monitoring-hard-disks-smart?page=0,0
firewall:~#
smartctl -l selftest /dev/hdf
smartctl version 5.38
[i686-pc-linux-gnu] Copyright (C) 2002-8 Bruce Allen
Home page is
http://smartmontools.sourceforge.net/
=== START OF READ SMART DATA
SECTION ===
SMART Self-test log structure revision number 1
Num
Test_Description Status Remaining LifeTime(hours) LBA
_of_first_error
# 1 Short offline Completed without error 00% 4760
-
# 2 Short offline Completed without error 00% 4759 -
smartctl
-P show /dev/hda
smartctl version 5.38 [i686-pc-linux-gnu]
Copyright (C) 2002-8 Bruce Allen
Home page is
http://smartmontools.sourceforge.net/
Drive found in smartmontools
Database. Drive identity strings:
MODEL: FUJITSU
MPE3084AE
FIRMWARE: EE-C0-23
match smartmontools Drive Database
entry:
MODEL REGEXP: ^FUJITSU MP[A-G]3...A[HTEV]U?
FIRMWARE
REGEXP: .*
MODEL FAMILY: Fujitsu MPA..MPG series
ATTRIBUTE
OPTIONS: 009 Power_On_Seconds
firewall:~# smartctl -i
/dev/hdf
smartctl version 5.38 [i686-pc-linux-gnu] Copyright (C)
2002-8 Bruce Allen
Home page is
http://smartmontools.sourceforge.net/
=== START OF INFORMATION
SECTION ===
Model Family: Seagate Barracuda 7200.7 and 7200.7 Plus
family
Device Model: ST340014A
Serial Number: 5JX5CCZ0
Firmware
Version: 3.06
User Capacity: 40,020,664,320 bytes
Device is: In
smartctl database [for details use: -P show]
ATA Version is: 6
ATA
Standard is: ATA/ATAPI-6 T13 1410D revision 2
Local Time is: Mon
Jun 28 17:02:03 2010 BST
SMART support is: Available - device has
SMART capability.
SMART support is: Enabled
firewall:~#
smartctl -a /dev/hda
smartctl version 5.38 [i686-pc-linux-gnu]
Copyright (C) 2002-8 Bruce Allen
Home page is
http://smartmontools.sourceforge.net/
=== START OF INFORMATION
SECTION ===
Model Family: Fujitsu MPA..MPG series
Device Model:
FUJITSU MPE3084AE
Serial Number: 05033850
Firmware Version:
EE-C0-23
User Capacity: 8,455,200,768 bytes
Device is: In
smartctl database [for details use: -P show]
ATA Version is: 4
ATA
Standard is: Exact ATA specification draft version not
indicated
Local Time is: Mon Jun 28 17:03:41 2010 BST
SMART
support is: Available - device has SMART capability.
SMART support
is: Enabled
=== START OF READ SMART DATA SECTION ===
SMART
overall-health self-assessment test result: PASSED
See
vendor-specific Attribute list for marginal Attributes.
General
SMART Values:
Offline data collection status: (0x00) Offline data
collection activity
was never started.
Auto Offline Data
Collection: Disabled.
Self-test execution status: ( 0) The
previous self-test routine completed
without error or no self-test
has ever
been run.
Total time to complete Offline
data
collection: ( 150) seconds.
Offline data collection
capabilities:
(0x1b) SMART execute Offline immediate.
Auto Offline data
collection on/off support.
Suspend Offline collection upon new
command.
Offline surface scan supported.
Self-test
supported.
No Conveyance Self-test supported.
No Selective
Self-test supported.
SMART capabilities: (0x0002) Does not save
SMART data before
entering power-saving mode.
Supports SMART
auto save timer.
Error logging capability: (0x01) Error logging
supported.
No General Purpose Logging support.
Short self-test
routine
recommended polling time: ( 2) minutes.
Extended
self-test routine
recommended polling time: ( 8) minutes.
SMART
Attributes Data Structure revision number: 16
Vendor Specific
SMART Attributes with Thresholds:
ID# ATTRIBUTE_NAME FLAG VALUE
WORST THRESH TYPE UPDATED WHEN_FAILED RAW_VALUE
1
Raw_Read_Error_Rate 0x000b 100 031 032 Pre-fail Always In_the_past
165489
2 Throughput_Performance 0x0005 100 100 020 Pre-fail
Offline - 0
3 Spin_Up_Time 0x0007 096 073 025 Pre-fail Always -
1
4 Start_Stop_Count 0x0012 098 098 016 Old_age Always - 1087
5
Reallocated_Sector_Ct 0x0033 099 099 024 Pre-fail Always - 2
7
Seek_Error_Rate 0x000b 100 100 020 Pre-fail Always - 2582
8
Seek_Time_Performance 0x0005 100 100 019 Pre-fail Offline - 0
9
Power_On_Seconds 0x0012 001 001 020 Old_age Always FAILING_NOW
24940h+02m+44s
10 Spin_Retry_Count 0x0013 100 100 020 Pre-fail
Always - 0
12 Power_Cycle_Count 0x0032 094 094 020 Old_age Always
- 987
196 Reallocated_Event_Count 0x0033 099 099 024 Pre-fail
Always - 2
197 Current_Pending_Sector 0x0010 100 100 020 Old_age
Offline - 0
198 Offline_Uncorrectable 0x0010 100 100 020 Old_age
Offline - 0
199 UDMA_CRC_Error_Count 0x000a 200 200 197 Old_age
Always - 1
200 Multi_Zone_Error_Rate 0x000b 100 087 020 Pre-fail
Always - 2176
SMART Error Log Version: 1
ATA Error Count: 672
(device log contains only the most recent five errors)
CR =
Command Register [HEX]
FR = Features Register [HEX]
SC = Sector
Count Register [HEX]
SN = Sector Number Register [HEX]
CL =
Cylinder Low Register [HEX]
CH = Cylinder High Register [HEX]
DH
= Device/Head Register [HEX]
DC = Device Command Register [HEX]
ER
= Error register [HEX]
ST = Status register [HEX]
Powered_Up_Time
is measured from power on, and printed as
DDd+hh:mm:SS.sss where
DD=days, hh=hours, mm=minutes,
SS=sec, and sss=millisec. It
"wraps" after 49.710 days.
Error 672 occurred at disk
power-on lifetime: 24215 hours (1008 days + 23 hours)
When the
command that caused the error occurred, the device was active or
idle.
After command completion occurred, registers were:
ER ST
SC SN CL CH DH
-- -- -- -- -- -- --
84 51 00 00 00 00 e0 Error:
ICRC, ABRT at LBA = 0x00000000 = 0
Commands leading to the command
that caused the error were:
CR FR SC SN CL CH DH DC
Powered_Up_Time Command/Feature_Name
-- -- -- -- -- -- -- --
---------------- --------------------
c8 00 01 00 00 00 e0 00
01:25:37.000 READ DMA
Error 671 occurred at disk power-on
lifetime: 24215 hours (1008 days + 23 hours)
When the command that
caused the error occurred, the device was active or idle.
After
command completion occurred, registers were:
ER ST SC SN CL CH
DH
-- -- -- -- -- -- --
84 51 00 00 00 00 e0 Error: ICRC, ABRT
at LBA = 0x00000000 = 0
Commands leading to the command that
caused the error were:
CR FR SC SN CL CH DH DC Powered_Up_Time
Command/Feature_Name
-- -- -- -- -- -- -- -- ----------------
--------------------
c8 00 01 00 00 00 e0 00 01:25:37.000 READ
DMA
Error 670 occurred at disk power-on lifetime: 24215 hours
(1008 days + 23 hours)
When the command that caused the error
occurred, the device was active or idle.
After command completion
occurred, registers were:
ER ST SC SN CL CH DH
-- -- -- -- --
-- --
84 51 00 00 00 00 e0 Error: ICRC, ABRT at LBA = 0x00000000 =
0
Commands leading to the command that caused the error were:
CR
FR SC SN CL CH DH DC Powered_Up_Time Command/Feature_Name
-- -- --
-- -- -- -- -- ---------------- --------------------
c8 00 01 00
00 00 e0 00 01:25:36.500 READ DMA
Error 669 occurred at disk
power-on lifetime: 24215 hours (1008 days + 23 hours)
When the
command that caused the error occurred, the device was active or
idle.
After command completion occurred, registers were:
ER ST
SC SN CL CH DH
-- -- -- -- -- -- --
84 51 00 00 00 00 e0 Error:
ICRC, ABRT at LBA = 0x00000000 = 0
Commands leading to the command
that caused the error were:
CR FR SC SN CL CH DH DC
Powered_Up_Time Command/Feature_Name
-- -- -- -- -- -- -- --
---------------- --------------------
c8 00 01 00 00 00 e0 00
01:25:36.500 READ DMA
Error 668 occurred at disk power-on
lifetime: 24215 hours (1008 days + 23 hours)
When the command that
caused the error occurred, the device was active or idle.
After
command completion occurred, registers were:
ER ST SC SN CL CH
DH
-- -- -- -- -- -- --
84 51 00 00 00 00 e0 Error: ICRC, ABRT
at LBA = 0x00000000 = 0
Commands leading to the command that
caused the error were:
CR FR SC SN CL CH DH DC Powered_Up_Time
Command/Feature_Name
-- -- -- -- -- -- -- -- ----------------
--------------------
c8 00 01 00 00 00 e0 00 01:25:36.500 READ
DMA
SMART Self-test log structure revision number 1
Num
Test_Description Status Remaining LifeTime(hours)
LBA_of_first_error
# 1 Short offline Completed: handling damage??
90% 24936 -
Device does not support Selective Self
Tests/Logging
firewall:~# smartctl -A /dev/hda
smartctl version
5.38 [i686-pc-linux-gnu] Copyright (C) 2002-8 Bruce Allen
Home
page is http://smartmontools.sourceforge.net/
=== START OF READ
SMART DATA SECTION ===
SMART Attributes Data Structure revision
number: 16
Vendor Specific SMART Attributes with Thresholds:
ID#
ATTRIBUTE_NAME FLAG VALUE WORST THRESH TYPE UPDATED WHEN_FAILED
RAW_VALUE
1 Raw_Read_Error_Rate 0x000b 100 031 032 Pre-fail Always
In_the_past 165489
2 Throughput_Performance 0x0005 100 100 020
Pre-fail Offline - 0
3 Spin_Up_Time 0x0007 096 073 025 Pre-fail
Always - 1
4 Start_Stop_Count 0x0012 098 098 016 Old_age Always -
1087
5 Reallocated_Sector_Ct 0x0033 099 099 024 Pre-fail Always -
2
7 Seek_Error_Rate 0x000b 100 100 020 Pre-fail Always - 2582
8
Seek_Time_Performance 0x0005 100 100 019 Pre-fail Offline - 0
9
Power_On_Seconds 0x0012 001 001 020 Old_age Always FAILING_NOW
24940h+03m+42s
10 Spin_Retry_Count 0x0013 100 100 020 Pre-fail
Always - 0
12 Power_Cycle_Count 0x0032 094 094 020 Old_age Always
- 987
196 Reallocated_Event_Count 0x0033 099 099 024 Pre-fail
Always - 2
197 Current_Pending_Sector 0x0010 100 100 020 Old_age
Offline - 0
198 Offline_Uncorrectable 0x0010 100 100 020 Old_age
Offline - 0
199 UDMA_CRC_Error_Count 0x000a 200 200 197 Old_age
Always - 1
200 Multi_Zone_Error_Rate 0x000b 100 087 020 Pre-fail
Always - 2176
firewall:~# smartctl -Hc /dev/hdf
smartctl
version 5.38 [i686-pc-linux-gnu] Copyright (C) 2002-8 Bruce
Allen
Home page is http://smartmontools.sourceforge.net/
===
START OF READ SMART DATA SECTION ===
SMART overall-health
self-assessment test result: PASSED
General SMART Values:
Offline
data collection status: (0x82) Offline data collection activity
was
completed without error.
Auto Offline Data Collection:
Enabled.
Self-test execution status: ( 0) The previous self-test
routine completed
without error or no self-test has ever
been
run.
Total time to complete Offline
data collection: ( 430)
seconds.
Offline data collection
capabilities: (0x5b) SMART
execute Offline immediate.
Auto Offline data collection on/off
support.
Suspend Offline collection upon new
command.
Offline
surface scan supported.
Self-test supported.
No Conveyance
Self-test supported.
Selective Self-test supported.
SMART
capabilities: (0x0003) Saves SMART data before entering
power-saving
mode.
Supports SMART auto save timer.
Error logging capability:
(0x01) Error logging supported.
No General Purpose Logging
support.
Short self-test routine
recommended polling time: ( 1)
minutes.
Extended self-test routine
recommended polling time: (
31) minutes.
firewall:~# smartctl -s on /dev/hda
smartctl
version 5.38 [i686-pc-linux-gnu] Copyright (C) 2002-8 Bruce
Allen
Home page is http://smartmontools.sourceforge.net/
===
START OF ENABLE/DISABLE COMMANDS SECTION ===
SMART
Enabled.
firewall:~# smartctl -t short /dev/hdf
smartctl
version 5.38 [i686-pc-linux-gnu] Copyright (C) 2002-8 Bruce
Allen
Home page is http://smartmontools.sourceforge.net/
===
START OF OFFLINE IMMEDIATE AND SELF-TEST SECTION ===
Sending
command: "Execute SMART Short self-test routine immediately in
off-line mode".
Drive command "Execute SMART Short
self-test routine immediately in off-line mode"
successful.
Testing has begun.
Please wait 1 minutes for test
to complete.
Test will complete after Mon Jun 28 17:07:37 2010
Use
smartctl -X to abort test.
firewall:~# smartd -q onecheck
smartd
version 5.38 [i686-pc-linux-gnu] Copyright (C) 2002-8 Bruce
Allen
Home page is http://smartmontools.sourceforge.net/
Opened
configuration file /etc/smartd.conf
Drive: DEVICESCAN, implied
'-a' Directive on line 22 of file /etc/smartd.conf
Configuration
file /etc/smartd.conf was parsed, found DEVICESCAN, scanning
devices
glob(3) found no matches for pattern /dev/sd[a-z]
glob(3)
aborted matching pattern /dev/discs/disc*
Problem creating device
name scan list
Device: /dev/hda, opened
Device: /dev/hda, found
in smartd database.
Num Test_Description Status Remaining
LifeTime(hours) LBA_of_first_error
# 1 Short offline Completed:
handling damage?? 90% 24936 -
Device: /dev/hda, is SMART capable.
Adding to "monitor" list.
Device: /dev/hdc,
opened
Device: /dev/hdc, found in smartd database.
Device:
/dev/hdc, is SMART capable. Adding to "monitor"
list.
Device: /dev/hdd, opened
Device: /dev/hdd, packet devices
[this device CD/DVD] not SMART capable
Unable to register ATA
device /dev/hdd at line 22 of file /etc/smartd.conf
Device:
/dev/hde, opened
Device: /dev/hde, found in smartd
database.
Device: /dev/hde, is SMART capable. Adding to "monitor"
list.
Device: /dev/hdf, opened
Device: /dev/hdf, found in
smartd database.
Device: /dev/hdf, is SMART capable. Adding to
"monitor" list.
Monitoring 4 ATA and 0 SCSI
devices
Device: /dev/hda, Failed SMART usage Attribute: 9
Power_On_Seconds.
Sending warning via
/usr/share/smartmontools/smartd-runner to root ...
Warning via
/usr/share/smartmontools/smartd-runner to root: successful
Num
Test_Description Status Remaining LifeTime(hours)
LBA_of_first_error
# 1 Short offline Completed: handling damage??
90% 24936 -
Started with '-q onecheck' option. All devices
sucessfully checked once.
smartd is exiting (exit status 0)
vi
/etc/default/smartmontools
# uncomment to start smartd on system
startup
start_smartd=yes