 Admin 2008 -->
Admin 2008 -->
Admin 2008 -->
Get Daryl Caudill's document on Shorewall Firewall installation below. It is extremely well written and thorough and covers loads of really good stuff. Hopefully he is updating it as mentioned, from Etch to Lenny now that Lenny is Stable as of now (Sept 09) v502a. I have just installed the basic Lenny i386 (ie no Desktop or servers) from the Netinstall Businesscard ISO (35MB) from the www.debian.org site, and succesfully installed this firewall on a 4GB USB stick for a Bastion type firewall (ie one with 2 NICs: eth0 (Internet/outside) and eth1 (LAN/inside).
I will outline my own version later that suits my own network, the differences from Darylls version and changes I made to his RULES file to suit me as a lowly home user who is not worried about user restrictions as its not a Corporate strength firewall I require (or at all! This is purely educational for me)
Daryls tutorial maybe a bit tough going for to follow for beginners and people with little or no Networking knowledge.
I always found Firewalling/Cisco ACL creation a nightmare (= Access Control Lists in Cisco speak) when doing the CCNA. The traffic flow directions and "initiation" theory seems logical enough but the implementation usually gets you in a confused state when/if the firewall doesnt work the way you think it should, (and with 3 NICs eg a DMZ - its worse as you would expect!) and usually ends in a certain amount of frustration, but you can always research further.
Get the PDF, Written By Daryl Caudill here: firewall.pdf
My network has a WIFI ADSL modem which will act as the "outside" (the Internet danger zone) to the Debian Linux box with the USB stick that I have installed Lenny Stable, and shorewall, dnsmasq, nmap, netstat-nat and other utilities, for getting to the first stage of Daryls firewall, which includes DHCP and DNS forwarding (from my ADSL modem) to the LAN via eth1, a function of dnsmasq. Eth0 is blocked from all but SSH and DNS from the ADSL modem.
[ADSL] <--> [eth0, WAN ] <----> [ Firewall zone ] <-----> [eth1, LAN ]
[ Inet ] <--> [I/O packets] <----> [packet initiation] <----> [I/O packets]
In my case, as my Livebox modem doesnt have a ping facility, to test the eth0 interface from "outside" I just connect as normal from my WIFI laptop to the modem, and as I have left the Livebox DHCP server to give a DHCP address to eth0, I can ping/nmap it (which should be blocked) but I should be able to connect via SSH AFTER modifying the Rules files to allow me in from my IP address, or address range etc.
Read also the 2 NIC setup page: www.shorewall.net/two-interface.htm
or get it HERE
apt-get install openssh-server
By default, this listens on all interfaces, port 22
vi /etc/ssh/sshd_config
Disable root logins if you wish but make sure you have a normal user account to access - set PermitRootLogin no
/etc/init.d/ssh restart
We require a clock source for correct log-times - install NTP
apt-get install ntp ntp-doc
Configure the "inside" LAN eth1 NIC to a static IP of your choice. This will be the default-gw for all the LAN pcs, eg 192.168.2.1 so must NOT be included in the DNSMasq DHCP pool if you use DHCP for your LAN when we config that later. As my ADSL Modem WAN network is 192.168.1.0, I will make the LAN 192.168.2.0
vi /etc/network/interfaces
iface eth1 inet static
address 192.168.2.1
netmask 255.255.255.0
network 192.168.2.0
broadcast 192.168.2.255
auto eth1
/etc/init.d/networking restart
Check the NICS have correct IPs, if eth0 is connected directly to the Inet via a switch etc. it is assigned via your ISPs DHCP server, eth1 should be as you just set it:
ifconfig
Install DNSMasq as DHCP server (optional), DNS and/or other masquerading (=port forwarding)
aptitude install dnsmasq
config dnsmasq to listen to LAN eth1 only and ignore the WAN eth0. Later the FW will also block DNS and DHCP requests from the WAN. So set "interface=eth1" (line 85). We can also do "dhcp-range=192.168.2.2,192.168.2.9,12h" for the LAN while here (line 131); uncomment "expand-hosts" (line 151) to add domain name to host names in hosts file; and set "domain=dnsdomainname". (line 124)
vi /etc/dnsmasq.conf
restart dnsmasq
/etc/init.d/dnsmasq restart
OK, thats dnsmaq working, you should get a DHCP ADDR assigned to a pc connected to eth1 now.
----------------------------------------------------------------------
Shorewall Install and config
aptitude install shorewall
READ THE DOCS in /usr/share/doc/shorewall-common/README.Debian after gunzipping it, and look at /etc/shorewall/shorewall.conf. We copy all the "two-interfaces" files from the /usr/share/doc/shorewall-common/examples/two-interfaces/* to our config dir /etc/shorewall/
cp -vr /usr/share/doc/shorewall-common/examples/two-interfaces/* /etc/shorewall/
Change file perms for only root access by server hardening guidelines (research this!!)
chmod 600 /etc/shorewall/*
Now we edit each of the important files in /etc/shorewall/ which are: shorewall.conf; zones; interfaces; masq; policy; and MOST importantly - rules, as this is where you overide all the others with specific actions from the others defaults to allow traffic that is otherwise blocked by default. READ THEM and try to understand them!! Note that the string "$FW" for firewall zone in the rules file is interchangeable to "fw". Daryll has mixed them in his example rule file. I have cut and pasted his and it works, so if yours does not after you modified it, YOU made an error! Easy done, as it takes time to familiarise yourself with this file.
Note that the basic default Shorewall rules file is badly laid out: For clarity I found it better to put each zone pair together as "to" and "from" so you can keep track of what traffic you are allowing to go where, especially as the file grows. There are 3 zones of 2 (in and out) directions of potential traffic that have to be thought about and configured through each of the NICS.
The actual FW box is the buffer zone between the Inet and the LAN. Traffic can be DROPPED (no notification reply=secure), REJECTED (notification sent to request source=insecure-gives info to hacker), ACCEPTED (legal hopefully) or MASQUERADED (=port forwarding; legal request to a service offered by your network) :
Inet to FW (eth0 in: NOTHING initiated from outside allowed EVER except for Secret "Port Knocking")
FW to Inet (eth0 out: apt-get updates on port80, Squid web proxy, NTP, DNSMasq, SSH Client to Net, ping/nmap to Web )
FW to LAN (eth1 out: maybe only to ping/nmap from the FW to the LAN if you have SSHd into the FW..)
LAN to FW (eth1 in: For security, users NEVER allowed direct WAN access, so they talk to the FW based Squid proxy server, which talks to the Web for them and caches the pages, unless you dont have an issue with users accessing anything on the Web..?)
LAN to Inet (eth1 in, eth0 out: NOTHING directly allowed usually, except Win updates and perhaps web based virus scans at specific IPs, yourself and maybe the boss..)
Inet to LAN (eth0 in, eth1 out; "through" traffic via DNAT - Destination Network Address translation ie port forwarding to your allowed services eg Webserver)
So you can see there are 6 path combinations that can be individually configured in the Rules file.
Just to confuse things, IF TURNED ON as a global parameter, the Firewalls internal table automatically tracks a sessions return traffic when valid, so you DONT have to think about or configure this traffic! That threw me at first, as I was thinking I had not configured a return path (eg for a ping) when I did not get the result I was expecting. Daryl explains this in Firewall Theory section
So, back to the config - edit zones file - no changes
vi /etc/shorewall/zones
fw firewall
net ipv4
loc ipv4
Edit interfaces file, add "dhcp" and "detectnets" to eth1 line
vi /etc/shorewall/interfaces
loc eth1 detect tcpflags,detectnets,nosmurfs,dhcp
This allows DHCPDISCOVER packets detection
vi /etc/shorewall/masq
look but dont touch masq file - already turned on to masq from eth0 to eth1
POLICY file - 2nd most important file! This defaults to allow all loc LAN traffic to the net=WAN. This maybe OK for home, but not for Corporate as outlined in the theory above, so we will lock it down to REJECT from ACCEPT, and log it with "info" here.
vi /etc/shorewall/policy
loc net REJECT info
loc $FW REJECT info
loc all REJECT info
All other sections here are fine, so finally we get to where the brainache starts - the RULES file. Here you configure all the exceptions to the generally prohibitive previous files policies, and open up holes in the wall for the traffic you want.
Here is Daryls example for you to study and paste to your own FW rules file (backup the original) as a start and edit accordingly:
rulesDaryl.txt
Here is my version. I have cut out a lot of unneeded stuff from Daryls working file so mine is a bit smaller and easier to read.
# From the NET to FW:
Ping/DROP net $FW # turned off logging of pings
Auth/DROP net $FW # breaks IRC clients, don't care
SSH/ACCEPT net $FW # we will close this & add portknock later
# From the FW to NET:
Ping/ACCEPT $FW net
SSH/ACCEPT $FW net
DNS/ACCEPT $FW net
NTP/ACCEPT $FW net
HTTP/ACCEPT $FW net # apt-get uses 80
ACCEPT $FW net icmp
# From the FW to LOC:
Ping/ACCEPT $FW loc
SSH/ACCEPT $FW loc
ACCEPT $FW loc icmp
# From the LOC to the FW:
Ping/ACCEPT loc fw
DNS/ACCEPT loc fw
ACCEPT loc fw tcp 8080 # dansguardian
ACCEPT loc fw tcp 3128 # squid (close this after testing dansguardian)
# From the LOC to the FW (priv users):
SSH/ACCEPT loc:192.168.2.2-192.168.2.10 fw
Webmin/ACCEPT loc:192.168.2.2-192.168.2.10 fw
HTTP/ACCEPT loc:192.168.2.2-192.168.2.10 fw
HTTPS/ACCEPT loc:192.168.2.2-192.168.2.10 fw
ACCEPT loc:192.168.2.2-192.168.2.10 fw tcp 3000 # ntop
# From the LOC to the NET (all users):
Ping/ACCEPT loc net
# DNS/ACCEPT loc net # we can close this, since they get dns from this firewall
# NTP/ACCEPT loc net # give specific rules to servers that need NTP access
# ACCEPT loc net:69.175.20.250 all # eg: justhost.com login port 2082
# ACCEPT loc net:72.14.221.109 all # eg: smtp.gmail.com 587
# ACCEPT loc net:216.239.59.109 all # eg: imap.gmail.com 993
# allow access to microsoft for windows updates
HTTP/ACCEPT loc net:207.46.0.0/16
HTTPS/ACCEPT loc net:207.46.0.0/16
HTTP/ACCEPT loc net:65.55.184.0/24
HTTPS/ACCEPT loc net:65.55.184.0/24
# then allow users direct access via general protocols
HTTP/ACCEPT loc:192.168.2.2-192.168.2.10 net
HTTPS/ACCEPT loc:192.168.2.2-192.168.2.10 net
SSH/ACCEPT loc:192.168.2.2-192.168.2.10 net
FTP/ACCEPT loc:192.168.2.2-192.168.2.10 net
POP3/ACCEPT loc:192.168.2.2-192.168.2.10 net
POP3S/ACCEPT loc:192.168.2.2-192.168.2.10 net
IMAP/ACCEPT loc:192.168.2.2-192.168.2.10 net
IMAPS/ACCEPT loc:192.168.2.2-192.168.2.10 net
SMTP/ACCEPT loc:192.168.2.2-192.168.2.10 net
SMTPS/ACCEPT loc:192.168.2.2-192.168.2.10 net
# From the NET to LOC (internal servers PORT FORWARDING):
# DNAT net loc:192.168.2.10:80 tcp 80 # web server
# DNAT net loc:192.168.2.2:5901-192.168.2.9:5901 tcp 5901 # vnc server
# DNAT net loc:192.168.2.2:5900-192.168.2.9:5900 tcp 5900 # vnc server (alter port #)
# DNAT net loc:192.168.2.2:22-192.168.2.9:22 tcp 22
NOTE: Each field is actually seperated by a tab space, but this is difficult to implement in HTML! You can see the 6 BOLD traffic directions listed above, each with packet filtering options set. This layout is a bit tidier and easier to keep track of I think. I have removed what I feel is unnecessary for clarity and space.
This file can be checked for mistakes by running:
shorewall check
If no errors are found we can remove the "No Config Inhibitors" by setting "STARTUP_ENABLED=Yes" and "IP_FORWARDING=On" in /etc/shorewall/shorewall.conf:
vi /etc/shorewall/shorewall.conf
Also, change "startup=1" in "/etc/default/shorewall"
vi /etc/default/shorewall
Now you can try and start Shorewall
shorewall start
If it starts OK, you may see log info on the console from blocked net traffic (broadcasts etc.) from other pcs or your DHCP server. As there is no /etc/default/klogd installed in Lenny, you cant switch it off in there as in the tutorial for Etch. I saw the line somewhere I think in a conf file so will try find it...but for now its quite useful for checking what is going on with the firewall when you ping/nmap it from another pc. I have to check this particular rules file works after editing it, and then check with SSH, Nmap and Pings from both eth0 and eth1 sides, that the firewall is doing what it should before going on to the next stage of adding Port Knocking, Squid web proxy server, the Intrusion Detection System Psad and fwsnort etc.
Testing the Firewall
LOC to FW
We expect to be able to ping and SSH from the LAN due to the lines:
# From the LAN (all users) to the FW:
Ping/ACCEPT loc fw
DNS/ACCEPT loc fw
# From the LAN (privileged machines) to the firewall:
SSH/ACCEPT loc:192.168.2.2-192.168.2.10 fw
Some output from NMAP reveals ports 53 DNS and 22 SSH open as we expect from the Rules lines above, and Ping is verified also as ICMP packets are sent by NMAP to do the scan:
Starting Nmap 5.00 ( http://nmap.org ) at 2009-09-05 17:42 Romance Daylight Time
NSE: Loaded 30 scripts for scanning.
Initiating ARP Ping Scan at 17:42
Scanning 192.168.2.1 [1 port]
Completed ARP Ping Scan at 17:42, 0.17s elapsed (1 total hosts)
Completed Parallel DNS resolution of 1 host. at 17:42, 6.52s elapsed
Scanning 192.168.2.1 [1000 ports]
Discovered open port 53/tcp on 192.168.2.1
Discovered open port 22/tcp on 192.168.2.1
Completed SYN Stealth Scan at 17:42, 0.81s elapsed (1000 total ports)
Scanning 2 services on 192.168.2.1
Retrying OS detection (try #5) against 192.168.2.1
NSE: Script scanning 192.168.2.1.
NSE: Starting runlevel 1 scan
Completed NSE at 17:42, 0.20s elapsed
Interesting ports on 192.168.2.1:
Not shown: 998 closed ports
PORT STATE SERVICE VERSION
22/tcp open ssh OpenSSH 5.1p1 Debian 5 (protocol 2.0)
| ssh-hostkey: 1024 fb:6d:2a:f8:23:2c:29:3f:0f:e5:c8:be:48:ac:bd:cb (DSA)
|_ 2048 3b:91:f4:fd:71:9b:bf:a2:87:2b:44:a9:8f:59:4a:cc (RSA)
53/tcp open domain dnsmasq 2.45
MAC Address: 00:D0:B7:2A:1B:4B (Intel)
No exact OS matches for host (If you know what OS is running on it, see http://nmap.org/submit/ ).
TCP/IP fingerprint:
OS:SCAN(V=5.00%D=9/5%OT=22%CT=1%CU=30410%PV=Y%DS=1%G=Y%M=00D0B7%TM=4AA28702
Network Distance: 1 hop
TCP Sequence Prediction: Difficulty=206 (Good luck!)
Service Info: OS: Linux
FW to LOC
We expect to Ping and SSH to the LAN also from the lines:
Ping/ACCEPT $FW loc
SSH/ACCEPT $FW loc
Here is the interesting output from NMAP scanning the LAN pc:
firewall:~# nmap 192.168.2.10
Starting Nmap 4.62 ( http://nmap.org ) at 2009-09-05 17:12 BST
sendto in send_ip_packet: sendto(5, packet, 44, 0, 192.168.2.3, 16) => Operation not permitted
Offending packet: TCP 192.168.2.1:43273 > 192.168.2.3:554 S ttl=47 id=63285 iplen=44 seq=4224388778 win=4096
sendto in send_ip_packet: sendto(5, packet, 44, 0, 192.168.2.3, 16) => Operation not permitted
Offending packet: TCP 192.168.2.1:43273 > 192.168.2.3:636 S ttl=59 id=29436 iplen=44 seq=4224388778 win=4096
sendto in send_ip_packet: sendto(5, packet, 44, 0, 192.168.2.3, 16) => Operation not permitted
Offending packet: TCP 192.168.2.1:43273 > 192.168.2.3:21 S ttl=45 id=30414 iplen=44 seq=4224388778 win=2048
sendto in send_ip_packet: sendto(5, packet, 44, 0, 192.168.2.3, 16) => Operation not permitted
Offending packet: TCP 192.168.2.1:43273 > 192.168.2.3:80 S ttl=46 id=55366 iplen=44 seq=4224388778 win=3072
sendto in send_ip_packet: sendto(5, packet, 44, 0, 192.168.2.3, 16) => Operation not permitted
Offending packet: TCP 192.168.2.1:43273 > 192.168.2.3:53 S ttl=48 id=63608 iplen=44 seq=4224388778 win=1024
sendto in send_ip_packet: sendto(5, packet, 44, 0, 192.168.2.3, 16) => Operation not permitted
Offending packet: TCP 192.168.2.1:43273 > 192.168.2.3:256 S ttl=37 id=14585 iplen=44 seq=4224388778 win=2048
sendto in send_ip_packet: sendto(5, packet, 44, 0, 192.168.2.3, 16) => Operation not permitted
Offending packet: TCP 192.168.2.1:43273 > 192.168.2.3:1723 S ttl=58 id=46716 iplen=44 seq=4224388778 win=3072
sendto in send_ip_packet: sendto(5, packet, 44, 0, 192.168.2.3, 16) => Operation not permitted
Offending packet: TCP 192.168.2.1:43273 > 192.168.2.3:25 S ttl=43 id=6011 iplen=44 seq=4224388778 win=4096
sendto in send_ip_packet: sendto(5, packet, 44, 0, 192.168.2.3, 16) => Operation not permitted
Offending packet: TCP 192.168.2.1:43273 > 192.168.2.3:389 S ttl=39 id=953 iplen=44 seq=4224388778 win=4096
sendto in send_ip_packet: sendto(5, packet, 44, 0, 192.168.2.3, 16) => Operation not permitted
Offending packet: TCP 192.168.2.1:43273 > 192.168.2.3:23 S ttl=58 id=30058 iplen=44 seq=4224388778 win=3072
Omitting future Sendto error messages now that 10 have been shown. Use -d2 if you really want to see them.
Interesting ports on 192.168.2.3:Not shown: 1714 filtered ports
PORT STATE SERVICE22/tcp closed ssh
We can see the arrival port numbers also at 192.168.2.10 here from source port number 43273 of the FW NIC eth1. As this was a normal NMAP scan with no switches, it seems to be a basic services scan as some of the port numbers are 21 FTP, 80 HTTP, 53 DNS, 25 SMTP, and 23 TELNET. Note that there is no SSH server on the pc, just the Windows client, Putty, so SSH is revealed as closed as I have an open return SSH session operating from what will be the Webserver pc.
------------------------------------------------------------------------
LOC to NET
# From the LAN (all users) to the Internet:
Ping/ACCEPT loc net
# allow access to microsoft for windows updates
HTTP/ACCEPT loc net:207.46.0.0/16
HTTPS/ACCEPT loc net:207.46.0.0/16...etc..
I can connect to Windows Updates, Ping the Internet, and access HTTPS and HTTP sites as expected.
NET to LOC
I have to have a Webserver running on the LAN and and test it from the WAN and run netstat-nat to check DNAT translations...later
------------------------------------------------------------------------
FW to NET
# From the FW to the Internet:
Ping/ACCEPT $FW net
SSH/ACCEPT $FW net
DNS/ACCEPT $FW net
NTP/ACCEPT $FW net
HTTP/ACCEPT $FW net # apt-get uses 80
ACCEPT $FW net icmp
I can run apt-get update (port 80 = HTTP), Ping the Internet, get NTP time, access SSH at 6530b, and Telnet 53 (DNS), but NOT Telnet 68 (DHCP) to my ADSL modem which is correct for all listings
NET to FW
# From the Internet to FW:
Ping/DROP net $FW # turned off logging of pings
Auth/DROP net $FW # breaks IRC clients, don't care
SSH/ACCEPT net $FW # we will close this & add portknock later
I have to Nmap from outside, ie my ADSL modem subnet 192.168.1.x to simulate incoming unsolicited traffic from the NET and should get ALL ports STEALTHED, ie NOT responding to anything except valid services I am running on the FIREWALL (SSH only at present - to be open ONLY to Port Knock later) and DNATed servers on the LOC LAN. I will run a LAN Webserver for testing this.
OK, I have a Webserver on the LAN, and changed the DNAT port 80 forwarding to active in the rules file, added a hub between the ADSL modem and eth0 so I can connect a test pc to the "WAN" zone. Both eth0 and the test pc get an IP address from the ADSLs DHCP server simulating the Internet.
However, after not getting the results I expected from testing i.e. EVERYTHING was BLOCKED (pings, NMAP, SSH and HTTP), I did some reading of the Shorewall web documentation about rfc1918 (Request For Comments) and realised this relates to Class A, B and C address packets which are NOT allowed on the Internet.
As we have Shorewall configured as if it was attached directly to the real Internet via eth0, and to detect RFC1918 packets in the INTERFACES file (net-eth0-detect-dhcp,tcpflags,norfc1918,routefilter,nosmurfs,logmartians) for eth0, I expect packets originating from any class A, B or C network address except DHCP would be blocked as they are illegal!
To test this assumption I removed rfc1918 from the INTERFACES file and re-tested. This time I could SSH into the FW via eth0, seemingly confirming the RFC theory, but I STILL could not access the Webserver, and nmap only revealed SSH to be open on the FW, so the DNAT does not seem to be working...more checking..
It turned out that the routing tables on the webserver were screwy, as I couldnt get OUT from the Linbox webserver but could before on the Winbox. Once the default gateway was fixed I could then access the Webserver on eth1 from outside of eth0. I also fixed blocks on my www.jusyhost.com:2082 secure login page and my Gmail send and receive ports 587 and 993 by adding:
ACCEPT loc net:69.175.20.250 all # justhost.com 2082 access
ACCEPT loc net:72.14.21.109 all # smtp.gmail.com 587 access
ACCEPT loc net:216.239.59.109 all # imap.gmail.com 993 access
to the RULES files. So all appears to be working as it should now...!
Here is some output from netstat-nat on the FW where we see the Port Address Translation occuring nicely due to the DNAT entry, and nmap on the test pc on eth0 outside:
firewall:~# netstat-nat
Proto NATed Address Destination Address State
tcp laptop:wipld 192.168.2.10:www TIME_WAIT
tcp laptop:1299 192.168.2.10:www TIME_WAIT
tcp laptop:1296 192.168.2.10:www TIME_WAIT
tcp 192.168.2.10:33069 review.nbonlinemarketing.c:www TIME_WAIT
tcp 192.168.2.10:34054 cl18.justhost.com:2082 ESTABLISHED
tcp 192.168.2.10:35309 mu-in-f109.google.com:imaps ESTABLISHED
tcp 192.168.2.10:34045 cl18.justhost.com:2082 TIME_WAIT
tcp 192.168.2.10:34052 cl18.justhost.com:2082 ESTABLISHED
testpc:~# nmap 192.168.1.3
Interesting ports on 192.168.1.3:
Not shown: 998 filtered ports
PORT STATE SERVICE VERSION
22/tcp open ssh OpenSSH 5.1p1 Debian 5 (protocol 2.0)
| ssh-hostkey: 1024 fb:6d:2a:f8:23:2c:29:3f:0f:e5:c8:be:48:ac:bd:cb (DSA)
|_ 2048 3b:91:f4:fd:71:9b:bf:a2:87:2b:44:a9:8f:59:4a:cc (RSA)
80/tcp open http Apache httpd 2.2.9 ((Debian))
Conclusions: It was a good move to do this tutorial and test in stages, as there is a LOT to absorb and think about. Writing this page at the same time helped, as it gives you time to think about problems, drink tea and learn! The RFC1918 issue was a classic and something I knew nothing of before. As usual with net faults, there is often a surprise waiting to trip you up and get you looking in the wrong place - the route problem was typical, as I automatically assumed there was a DNAT problem in the RULES file because nmap showed SSH but not HTTP available so I could have suffered a LOT looking to fix a problem that didnt exist. The fact that the SSH is hosted ON THE FIREWALL and the HTTP on the local LAN skipped over me! The route problem was due to changing the IP address to the correct static value using #ifconfig eth0 192.168.2.10, from the first DHCP acquired from DNSMasq. Changing that to the static IP then messed up the default route on the webserver. I was lucky I tried to surf the NET from that machine after that change, as just browsing to 127.0.0.1 to check the wepage was showing locally was NOT sufficient to assume the server could be seen from its eth0 outside, it just shows that Apache2 is running locally! Anyway, we can now move on to the next stages involving Squid, Webmin, Psad etc. I think I would like to test the IDS first.
Stage 2 Intrusion Detection Systems - PSAD, Port Scan Attack Detector
aptitude install psad
Read the man page!
man psad
read the conf file and edit according to Darylls examples:
vi /etc/psad/psad.conf
change:
EMAIL_ADDRESSES root@localhost; (you can have multiple addresses here)
HOSTNAME server; (put your local server name here)
HOME_NET: 192.168.2.0/24; (put your LAN net here)
- EXTERNAL_NET: 192.168.1.0/24; (put your WAN net here)
EMAIL_ALERT_DANGER_LEVEL 3; (you don't want to be flooded with emails, set to 3)
IMPORT_OLD_SCANS Y; (keep history of attackers)
Unfortunately psad expects the old Etch syslog.conf file to be configured, which has been dropped for rsyslog in Lenny, so need to research this to fix it...
OK, I think I sussed it..a bit if digging and editing files seems to have cracked it..from the man psad document, /etc/syslog.conf needs to have "kern.info | /var/lib/psad/psadfifo" added to the bottom of the file, so we add this to /etc/rsyslog instead.
Next, looking in the actual daemon file of psad, /etc/init.d/psad I found in the script that the prog searches for the existence of the old /etc/syslog.conf, or the newer /etc/syslog-ng/syslog-ng.conf files, then greps for the existence of "psadfifo" string in one of these files, so I just added our newly modified /etc/rsyslog.conf to this line as another file for this program to look in to find "psadfifo" and "trick" it into running
Finally, I changed "syslogd" to "rsyslogd" in the SYSLOG_DAEMON line (63) in /etc/psad/psad.conf, BUT as this maybe ONLY accepts the four log daemon variables stated here, it may cause the program to not find information depending on what else reads this file, but these changes are sufficient to get psad to run using:
# /etc/init.d/psad start
So now, the testing with NMAP from outside/inside can start, as this generates lots of pings to be blocked and see what information gets logged in the many log directories: /var/log/psad/*, /var/log/messages etc. or in real time on the console as we still have not stopped this, and kernel info on ALT-F8 if TTY8 is configured, as some scan info shows up here also. Yep! Plenty of log info there. I am not receiving email alerts to root even though this address was set in psad.conf but I AM getting the alerts in my normal user account..? Might check this out later. To delete all the mail, as it builds up quite quick:
echo 'd *' | mail -N -u username
Stage 2 - Continuing with Squid, Dans Guardian and Webmin
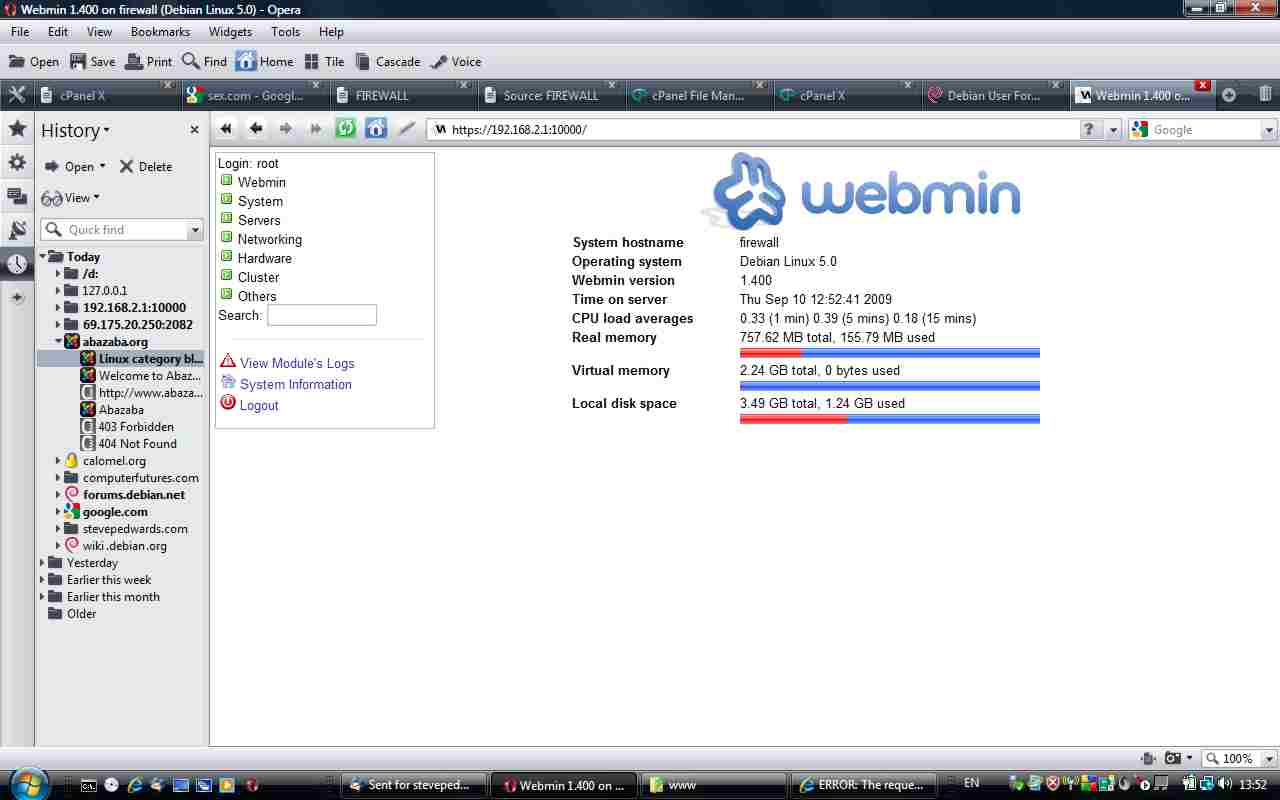
Webmin is reasonably straightforward - get the latest version webmin_1.xx_all.deb from sourceforge or webmin_1.400_all.deb from here, copy it to your Firewall pc and try and "fail" to install it first using: dpkg -i webmin_1.400_all.deb as this will tell you the exact dependencies required. Install these perl/pam/openssl libraries, using apt-get install, and webmin then installs also. From the LAN, type https://192.168.2.1:10000 into your LAN pc browser and you will get the Webmin logon page (ignore the failed Certificate warning and continue). Note: you cannot use the wget link in Daryls page from the Firewall cmd line - it gets re-directed only via a browser to the wget surfnet link below!
wget http://6530b/webmin_1.400_all.deb
wget http://surfnet.dl.sourceforge.net/project/webadmin/webmin/1.400/webmin_1.400_all.deb
dpkg -i webmin_1.400_all.deb
I really like the look of this utility and there is loads of stuff to look at here..keep ya busy playing with that for a while..!
aptitude install squid
The squid config file is ludicrously massive, and takes forever to read, let alone understand and edit, so I searched the web for some How Tos to cut corners a bit. I found an interesting site at:
https://calomel.org/squid.html
which has a working squid.conf file that is cut down to the basics, which I have modified to suit my network:
Follow the How To for the key sections, and suit yourself. I decided to not use the re-director section just yet. Take a look in the /var/log/squid/* logs also so you know what is there. Transfer this file to your Firewall pc once edited, and copy it as /etc/squid/squid.conf after backing up the original to squid.conf_BAK or similar for future reference. Start squid.
/etc/init.d/squid start
On the LAN pc, set the browser (for IEx - Tools/Internet Options/Connections Tab/LAN Settings/ and set the proxy server box to the IP/port 8080 address you set in squid.conf so your browser will now talk to squid to access the Internet on its behalf. You can view the logs to see the actions, or view them in real time as you access webpages:
tail /var/log/squid/access.log
Test for general unrestricted web access then lock down accordingly by adding site addresses and uncommenting the "acl Bad_Site dstdom_regex myspace.com" and "http_access deny Bad_Site" lines of the "## Banned Sites" section of squid.conf and restart squid to test blocking is ocurring. This worked fine for me. Continue researching the multitude of Squids other blocking capabilities as you wish.
A useful tool for multilog realtime views in 1 TTY:
apt-get install multitail
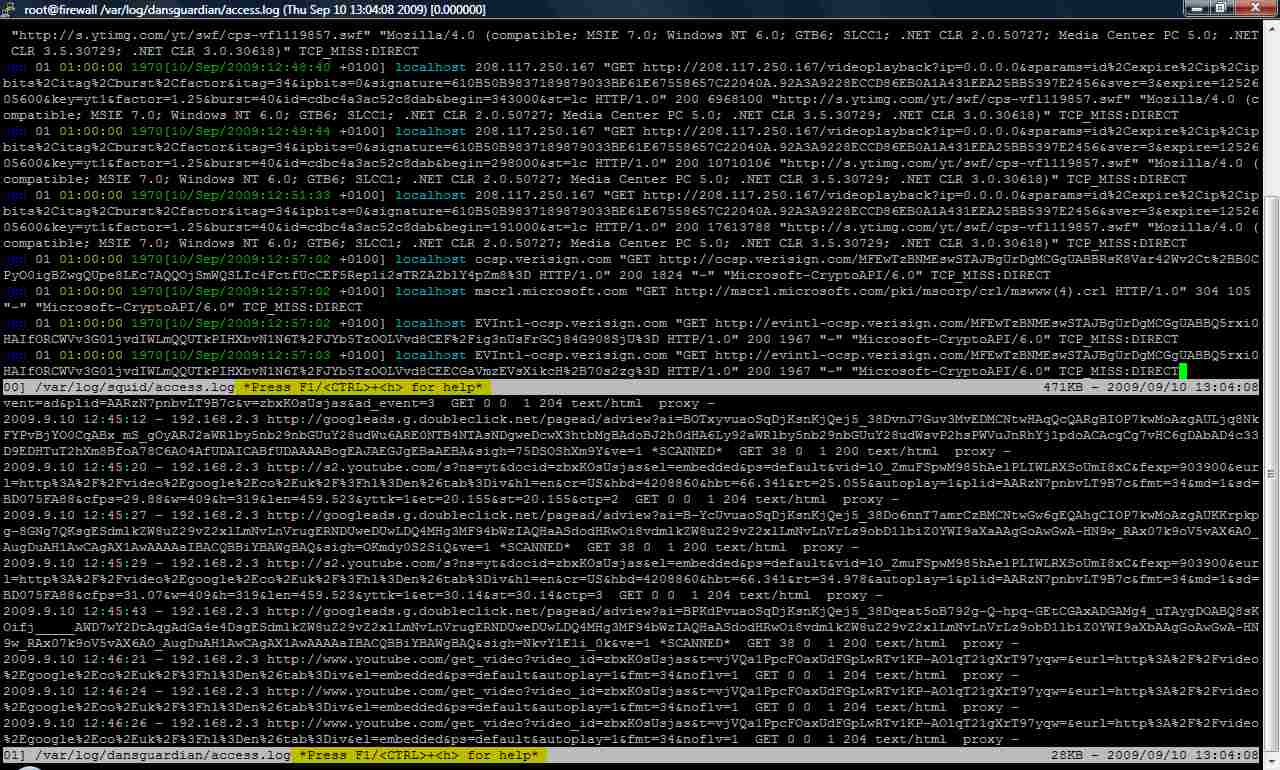
multitail /var/log/squid/access.log /var/log/dansguardian/access.log
aptitude install dansguardian
Read the man page and conf file!
OK, this was not so straightforward as the first thing that happened upon starting DG was a "dansguardian failed connect to proxy" warning. Finding a decent how to, as DG has a largish (600 line) conf file, was hard, but I managed to piece together some bits from the Web.
Firstly, understand that Squid "fetches" (and blocks what was set before) the web pages, but now DG does the "content filtering" using its libraries of "bad" words like "sex" etc. DG works IN CONJUNCTION with Squid (and technically is NOT a server, its a filter), so Squid needs to start FIRST at boot, as DG needs to connect to Squids open ports else it wont start. Some people had problems with their boot sequence also as DG was starting before Squid which can be ammended in the rc.d files explained at the top of this page.
Because we have (fortunately!) installed and tested Squid FIRST, we know that we changed its default ports from 3128 to 8080, which is standard for a proxy server. The default port for DG is 8080, se we need to change squid.conf back to 3128 and restart Squid. Squids daemon also runs in its own default Group of "proxy". DG also needs to run in this Group to connect to Squid. Edit lines:
vi /etc/dansguardian/dansguardian.conf:
UNCONFIGUred - Please remove this line after configuration (as I did before with the PSAD daemon, I looked in /etc/init.d/dansguardian script and you can see another grep function for the existence of this line in the conf file, and if so, the program wont run - a simple run/norun condition. You can just put a hash in front i.e. "#UNCONFIGUred" to mess up the search. Leave filterip blank so DG listens on ALL interfaces.
filterip =
filterport = 8080
proxyip = 127.0.0.1
proxyport = 3128 (line 95)
daemonuser = 'proxy'
daemongroup = 'proxy' (line 600)
Once this was done, DG complained it could not open/create the /var/log/dansguardian/access.log file due to wrong permissions. Checking this we find that the owner/group is default "dansguardian" so we change this:
chown proxy:proxy /var/log/dansguardian/access.log
Start DG: /etc/init.d/dansguardian start
And now we are back to Error connecting to parent proxy"...Damn!
Oops! I had missed changing the squid.conf http_port value to 127.0.0.1:3128. Now restart DG, AFTER stopping and starting Squid (2 processes running, so need "ps aux | grep squid" to find their PIDs then kill them with "kill -9 PIDnumber". Back to testing DG and checking again the browser proxy port is set to 8080..looking good..I have the blocking of the named sites I had in Squid still, and I am getting logging to DG access.log file, and a block page when searching google for the word "sex":
| Access has been Denied! | |
| - | |
| YOUR ORG NAME |
Access to the page:
http://www.google.co.uk/search?hl=en&q=sex&meta=&rlz=1I7ADFA_en ... has been denied for the following reason: Weighted phrase limit exceeded. Categories: Pornography, Pornography (German) You are seeing this error because what you attempted to access appears to contain, or is labeled as containing, material that has been deemed inappropriate. If you have any queries contact your ICT Coordinator or Network Manager. Powered by DansGuardian |
Just to cover for any typos in this webpage, I have included the actual working .conf files below to download for all the apps I have installed for my network
Stage 3 - Back to Tweaks - Port Knocking
Go here to read about actions:www.shorewall.net/Actions.html#Defining
Copy the actions.template file to /etc/shorewall/action.SSHKnock
cp -v /usr/share/shorewall/actions.template /etc/shorewall/action.SSHKnock
Create the SSHKnock action file by pasting the IPTables commands below into:
vi /etc/shorewall/SSHKnock
if [ -n "$LEVEL" ]; then
log_rule_limit $LEVEL $CHAIN SSHKnock ACCEPT "" "$TAG" -A -p tcp --dport 22 -m recent --rcheck --name SSH
log_rule_limit $LEVEL $CHAIN SSHKnock DROP "" "$TAG" -A -p tcp --dport ! 22
fi
run_iptables -A $CHAIN -p tcp --dport 22 -m recent --rcheck --seconds 60 --name SSH -j ACCEPT
run_iptables -A $CHAIN -p tcp --dport 1599 -m recent --name SSH --remove -j DROP
run_iptables -A $CHAIN -p tcp --dport 1600 -m recent --name SSH --set -j DROP
run_iptables -A $CHAIN -p tcp --dport 1601 -m recent --name SSH --remove -j DROP
Decide what port you want for your port knock - Im copying Daryls 1600 for easy cut/paste into files:
If you study the script, you will see that it will open port 22 upon receiving any TCP packet on port 1600. It will also close port 22 if it receives any TCP packet on port 1599 or 1601. If somebody port scans your computer, usually sequentially, this will prevent them from opening the port after a full scan.
Next, add "SSHKnock" before the last line in:
vi /etc/shorewall/actions
Next, edit the /etc/shorewall/rules file, and add this line (put it in the 'from Internet to FW'):
SSHKnock net $FW tcp 22,1599,1600,1601
REMEMBER to comment out the old SSH/ACCEPT line!! Then test the rule file:
#SSH/ACCEPT net $FW # close and add portknock later
SSHKnock net $FW tcp 22,1599,1600,1601
# shorewall check
If everything checks out, then restart the firewall:
# shorewall restart
From the WAN side, test the port knock with a normal port 22 access which should fail, then with port 1600 to "Knock" port 22 open, and in a 2nd window, log in normally on port 22:
ssh -p 1600 root@192.168.1.3
ssh root@192.168.1.3
OK, it works! After waiting for a minute it was not possible to SSH in normally as should be.
A port scan with NMAP shows:
t5500:~# nmap 192.168.1.3
Starting Nmap 4.68 ( http://nmap.org ) at 2009-09-10 22:06 CEST
Interesting ports on 192.168.1.3:
Not shown: 1714 filtered ports
PORT STATE SERVICE
80/tcp open http
VNStat - Traffic Logger
apt-get install vnstat
This is a simple and easy to use console tool for logging traffic stats over various time periods - day, week, month etc.
Read the man page for a brief overview and switches, then set up the database for logging stats from an interface:
vnstat -u -i eth0
After generating sufficient traffic by surfing etc. view the stats in "simple" view:
vnstat -s -i eth0
rx / tx / total / estimated
eth0:
today 1.12 MB / 243 kB / 1.36 MB / --
And that is pretty much "IT" for now. Hope you enjoyed this page - you can leave feedback for myself and Daryl at the forum below, as we hope to create a definitive tutorial between us for all that we have covered, and get it posted on the Vendors websites, and anywhere else it would be of use.
Summary: This was a LOT of work and a lot of fun, and I learned TONS of good stuff along the way! I learned more tools like vnstat, netstat-nat, multiview, and thought of some good things myself, like hacking the PSAD Daemon to get it to work with Rsyslog. There is still loads more to look at here too that I only scratched the surface of, such as advanced filtering of web content, webmin admin, port knocking, squid/DG authorisation access control, more complex Psad ACLS etc.
A big THANKS to Daryl Caudill for writing his original Firewall tutorial, without which I would not have got so involved with this topic. I have a much greater appreciation for people who take the time and effort to write clear and concise Linux documents, it is very time consuming but worthwhile as a learning process!
For more information on Drokmeds original document, read and join the forum: